

Shopify Plus Store Development Guide: A Step-by-Step Approach

Powered by an expert content team, this blog blends SEO precision with compelling storytelling. Every insight is supported by data-driven research, ensuring content that ranks, engages, and drives conversions.
Our authors are proven experts in their fields, writing on topics where they have demonstrated expertise. Every piece of content undergoes peer review and validation by industry professionals.
AI Summary
Key Highlights of Shopify Plus Store Development Guide
This post explores how to build a high-performing Shopify Plus store through a step-by-step development guide. The key insight: mastering domain setup, store design, product and inventory management, plus sales strategies creates a seamless shopping experience. It serves e-commerce entrepreneurs and developers aiming to scale rapidly using Shopify Plus. The guide details purchasing or connecting domains, choosing and customizing themes, managing products and variants, and optimizing inventory. It also covers marketing tactics like SEO and email campaigns to boost traffic and conversions. Readers gain practical steps and resources to launch and maintain a professional, scalable online store effectively.
Are you ready to take the e-commerce business to new heights? Shopify Plus is an enterprise-grade platform designed to fuel rapid growth and scale. This comprehensive Shopify Plus store development guide will cover the essential steps to build a high-performing Shopify Plus store. From setting up the custom domain to mastering advanced product management, we’ll cover everything needed to create a seamless customer shopping experience. Even developers will find valuable information here, covering everything from the basics to the most detailed aspects of Shopify Plus store development.
Want to understand the difference between Shopify and Shopify Plus? Check out our blog, Shopify vs. Shopify Plus: Essential Features for Merchants to Know
Step-by-Step Process for Shopify Plus Store Development
1. Domain
A domain is a unique web address users type into their browsers to access a website. For Shopify Plus store development, having a custom domain helps establish a professional online presence and enhance brand identity. Shopify offers options for purchasing a domain directly through their platform or connecting an existing third-party domain.
Adding a Domain to the Shopify Store
Purchase a Domain through Shopify:
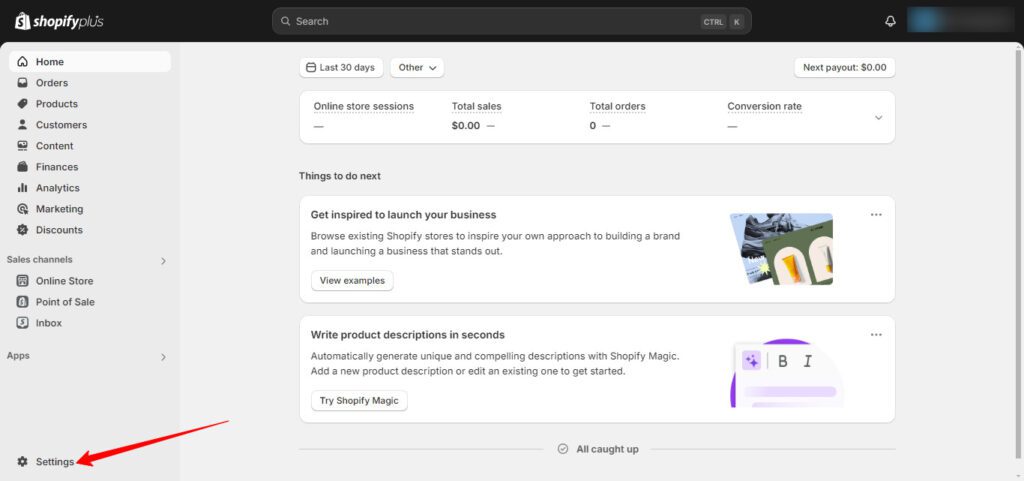
- Go to the Shopify admin and click on Settings.
- Select Domains.
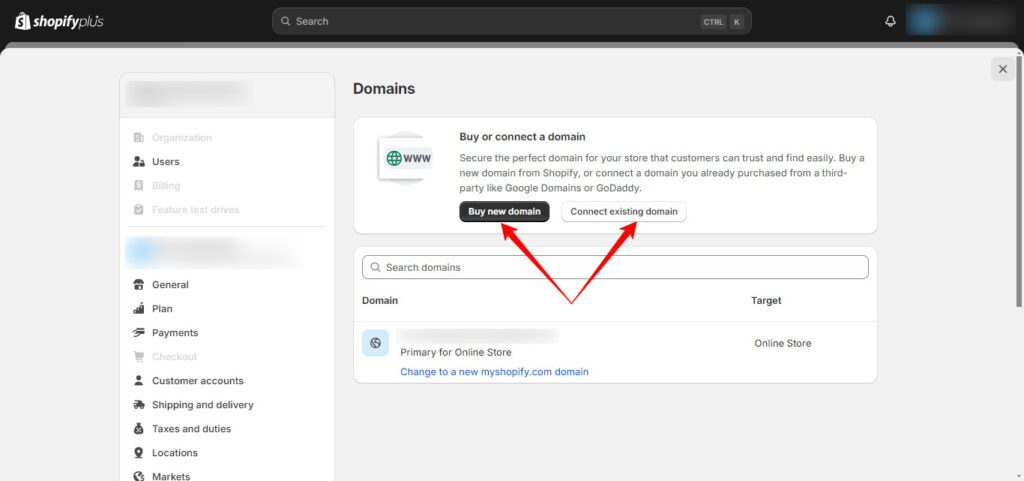
- Click Buy new domain.
- Enter the desired domain name and click check availability.
- Choose a domain from the available options and click Buy domain.
- Complete the purchase by following the checkout process.
Connecting existing Domain
- Go to the Shopify admin and click on Settings.
- Select Domains.
- Under Domains, click Connect Existing Domain.
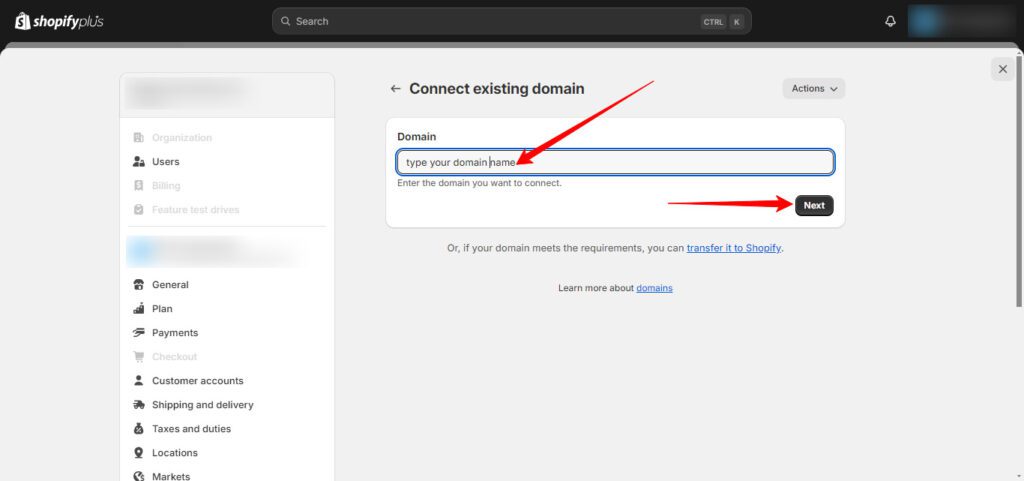
- Enter the domain name and then click Next.
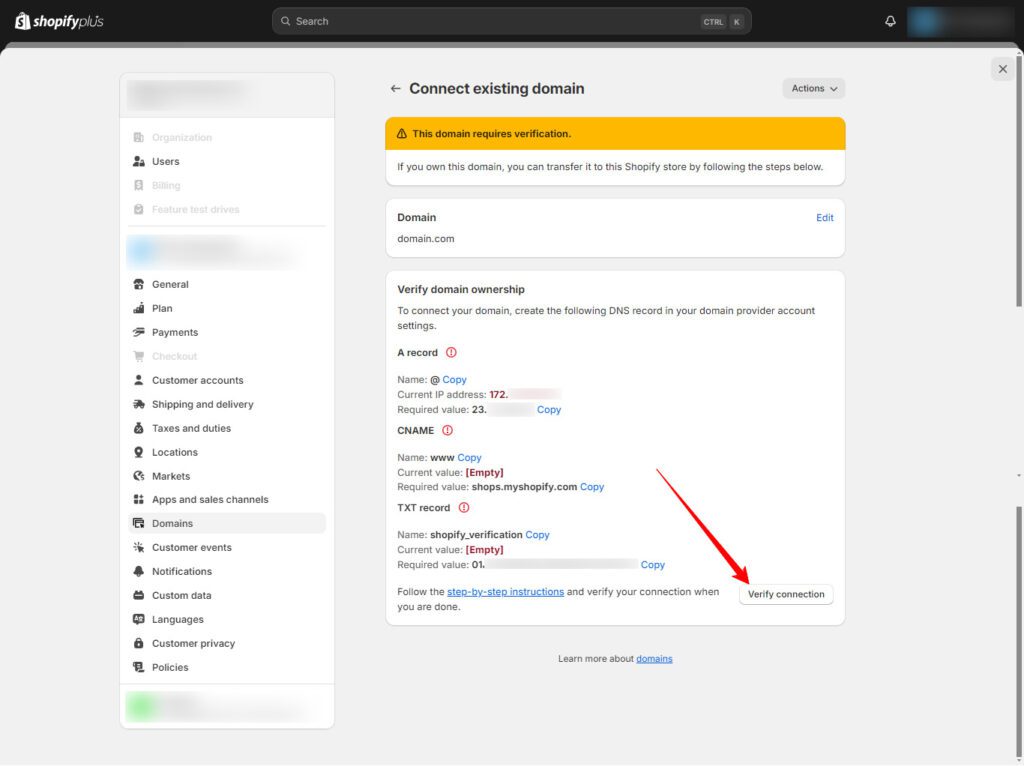
- Follow the instructions to complete the verification process. This might involve adding a CName & TXT record to DNS settings at the domain registrar to prove domain ownership.
A CNAME record (Canonical Name record) is a type of DNS record that creates an alias for a domain name. Instead of pointing directly to an IP address, it points to another domain name. This simplifies the management of multiple domains and subdomains by redirecting them to a single destination.
Shopify will provide specific DNS settings that need to be updated at the domain registrar, such as modifying the A record to point to Shopify’s IP address and setting the CNAME record to shops.myshopify.com for the subdomain (like www). Then add the given TXT records to the DNS and click Verify connection. Once these records are updated with the registrar, it may take up to 48 hours for the changes to take effect and for the domain to fully connect to the Shopify store.
Following these steps, the domain can be effectively managed and properly integrated with the Shopify store. For detailed instructions and troubleshooting, refer to Shopify’s help documentation on domains.


2. Store Design and Customization
A theme is a pre-designed template that serves as the foundation for a Shopify store’s visual appearance and structure. It defines the overall look, feel, and layout of the website. Think of it as the skeleton structure that determines how the products, images, and text are displayed. With thousands of themes available, ranging from free to premium options, choosing the right one is crucial for creating a strong first impression.
This guide will cover selecting, customizing, and optimizing a Shopify Plus theme to build a visually stunning and customer-focused online store.
Choosing a Theme (Free or Paid Themes)
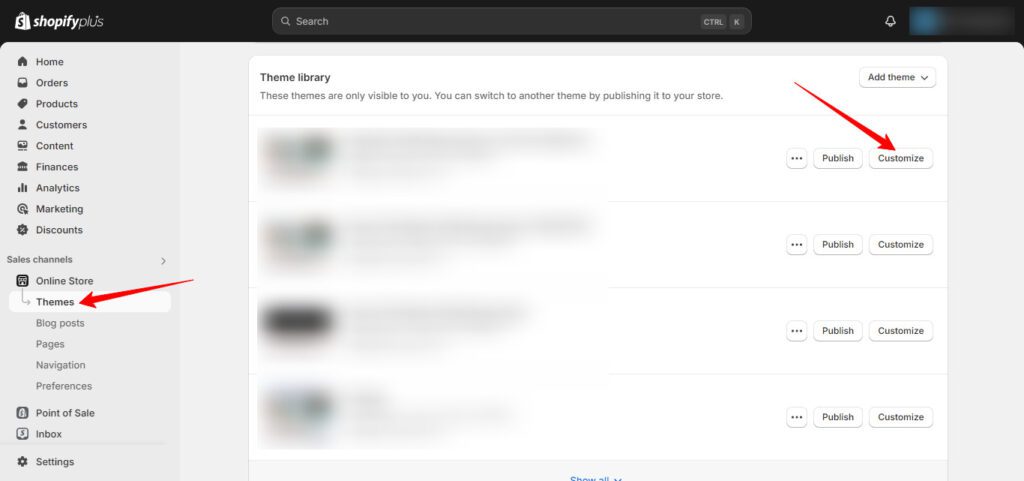
- Step 1: Log in to Shopify admin.
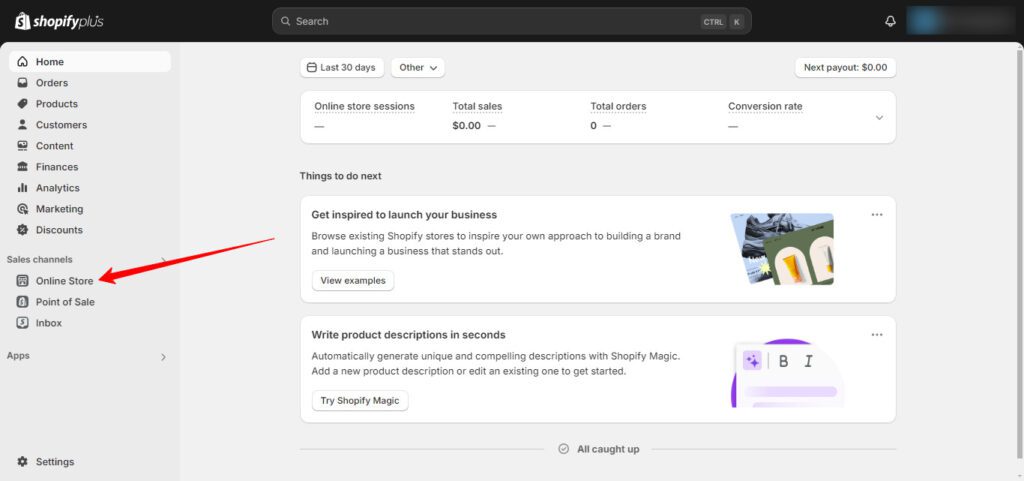
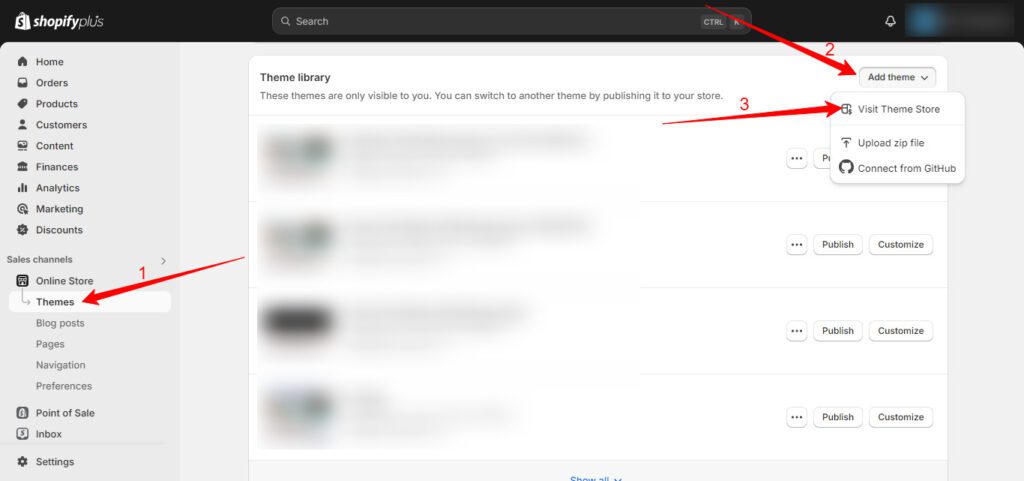
- Step 2: Go to Online Store > Themes.
- Step 3: Scroll down to the Theme Library section.
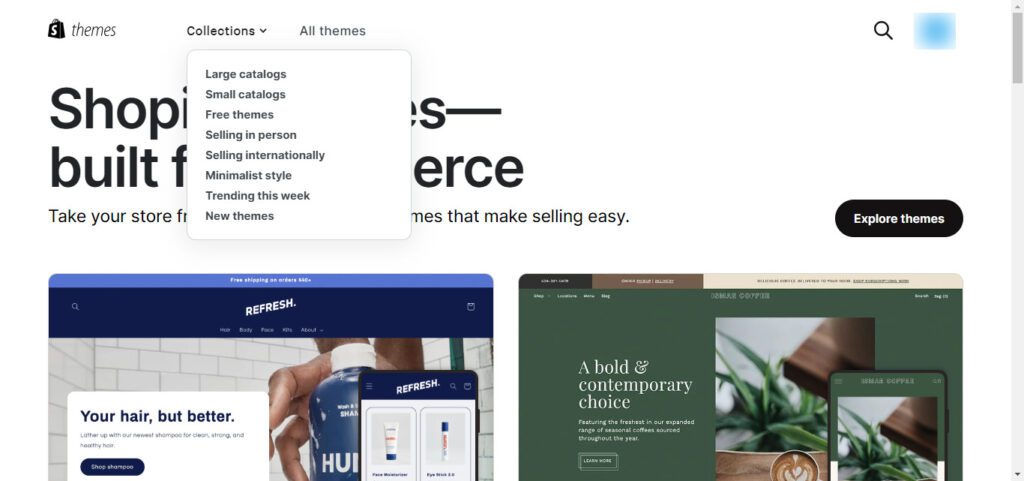
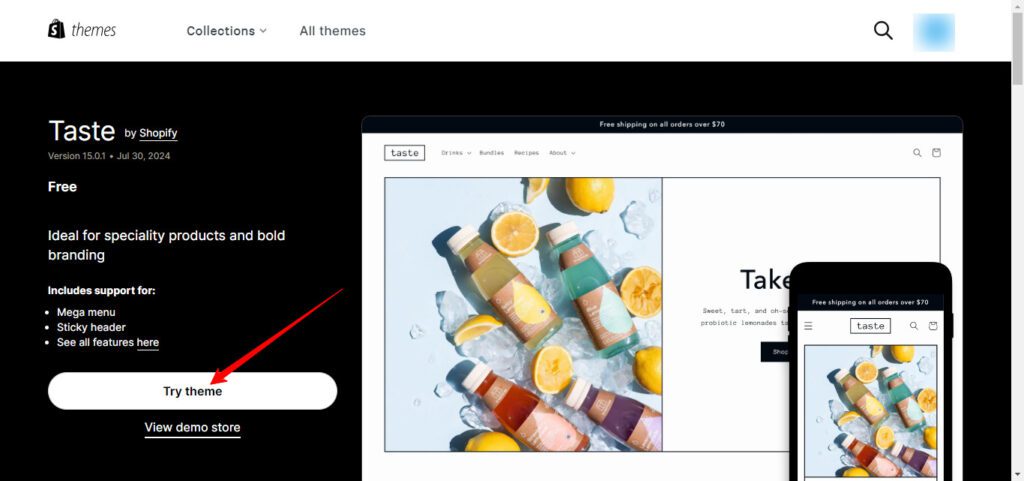
- Step 4: Click Explore free themes to view Shopify’s free options. For more choices, click Visit Theme Store to browse paid themes.
- Step 5: Compare themes based on needs (e.g., features, layout, style). Free themes are basic but cost-effective, while paid themes typically offer more features and customization.
- Step 6: Once a theme is selected, click Add to Theme Library.
Theme Customization Options
- Step 1: After adding a theme to the library, click Customize beside the theme in the Online Store > Themes section.
- Step 2: Use the left-hand panel to navigate through various sections of the theme (e.g., Header, Footer, Product pages).
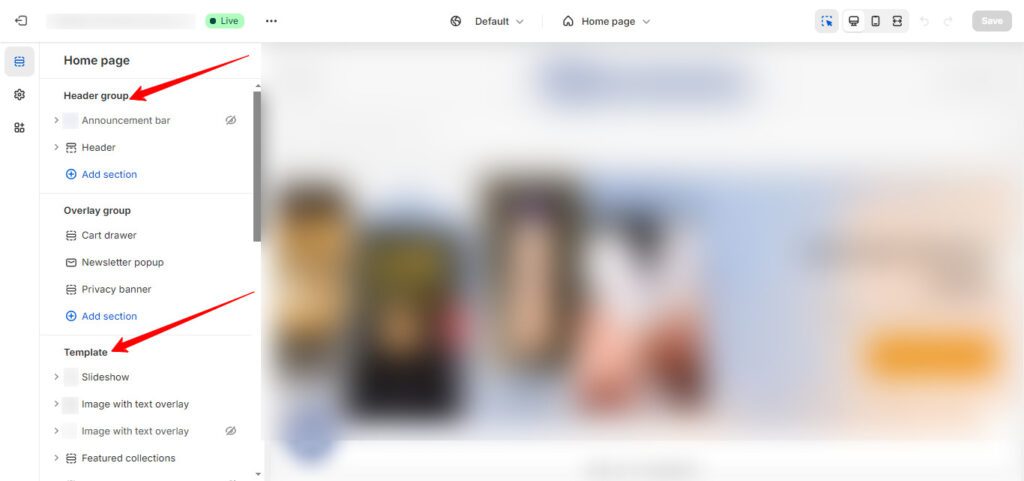
- Step 3: Adjust the colors, fonts, and layout options to align with the brand.

- Step 4: Use the live preview on the right to see the changes in real time.
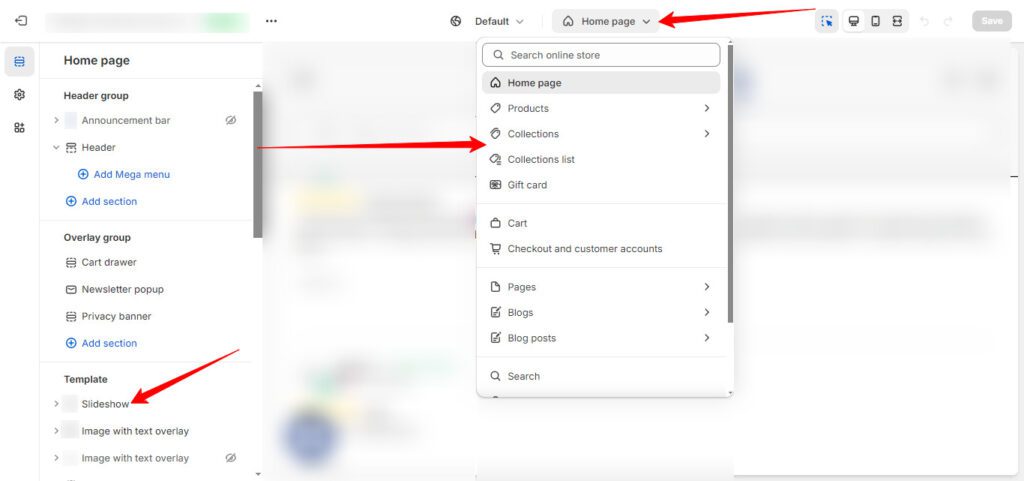
Customizing the Store’s Appearance (Using the Shopify Plus Theme Editor)
- Step 1: Go to Online Store > Themes in the Shopify admin.
- Step 2: Click Customize next to the active theme.
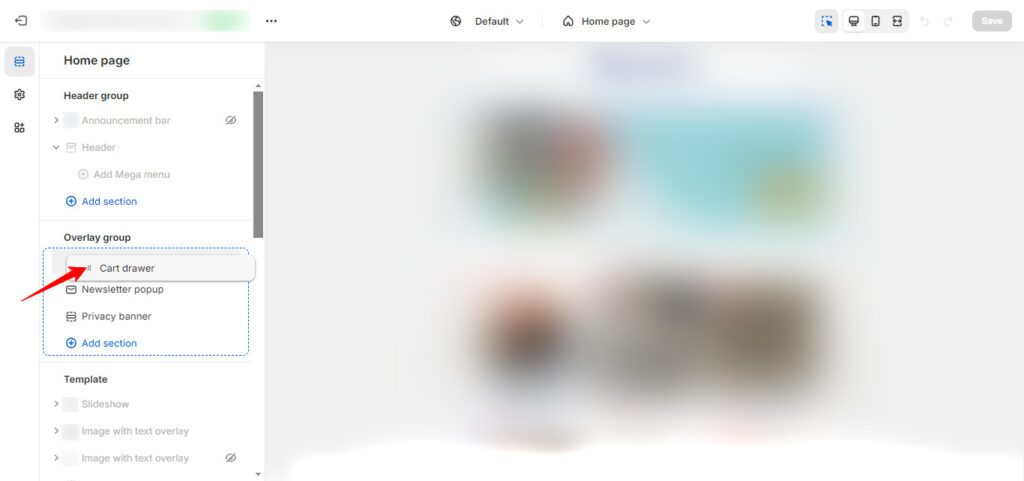
- Step 3: Use the editor’s drag-and-drop interface to rearrange sections, add new content blocks, and modify the store’s layout.
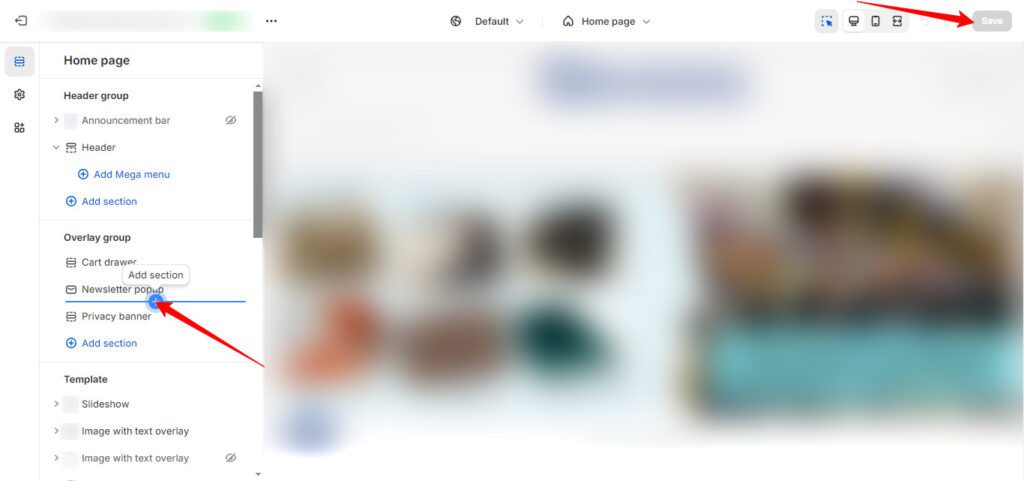
- Step 4: Save edits regularly to maintain the design changes.
For developers interested in further customizing their store’s functionality through APIs, check out our Shopify API Guide: What is an API, Available Types of Shopify APIs, and How to Access Shopify API?
Customizing Layouts and Sections
- Step 1: In the theme editor, navigate to the desired section to customize (e.g., Homepage, Product page).
- Step 2: Click on a section or block to reveal customization options. These can include text, images, videos, and buttons.
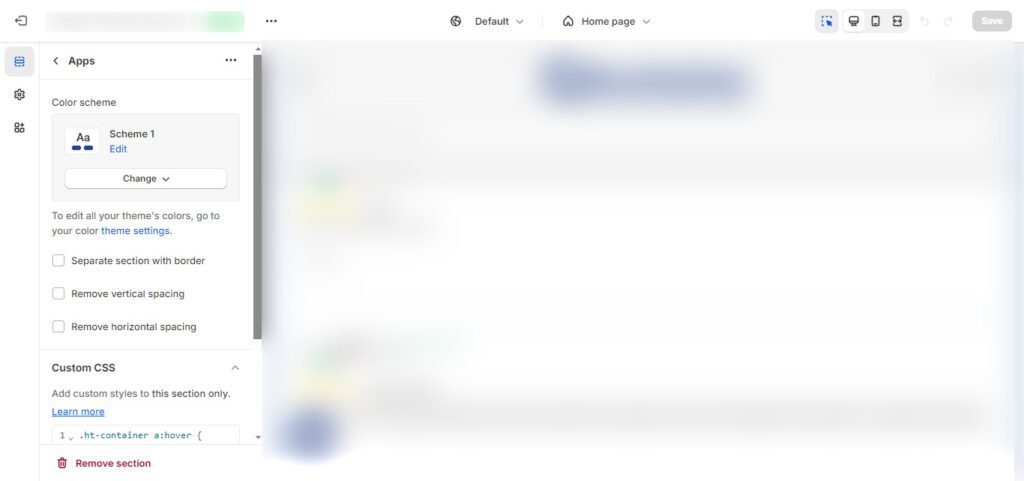
- Step 3: For more advanced layout changes, editing the code directly may be necessary, which can be done in the Actions > Edit Code section of the theme.
Step 4: After making changes, click Save.
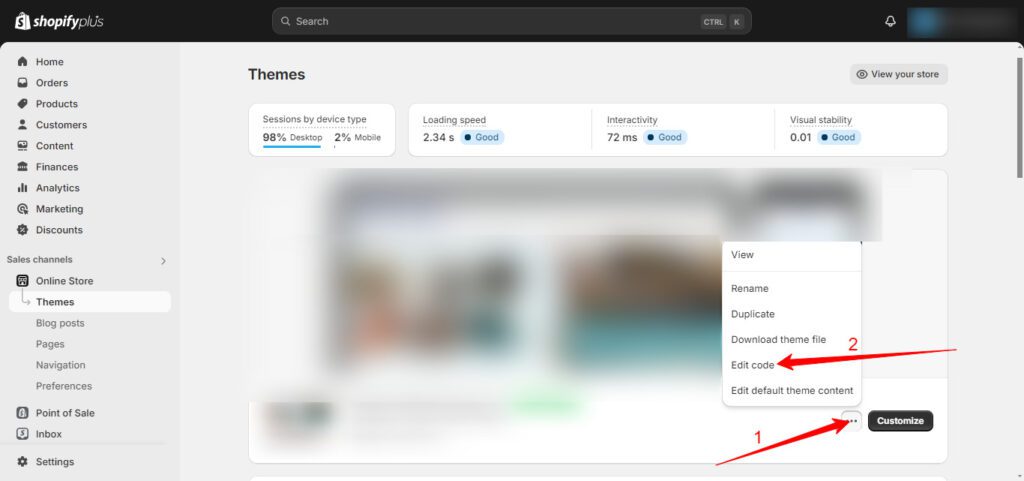
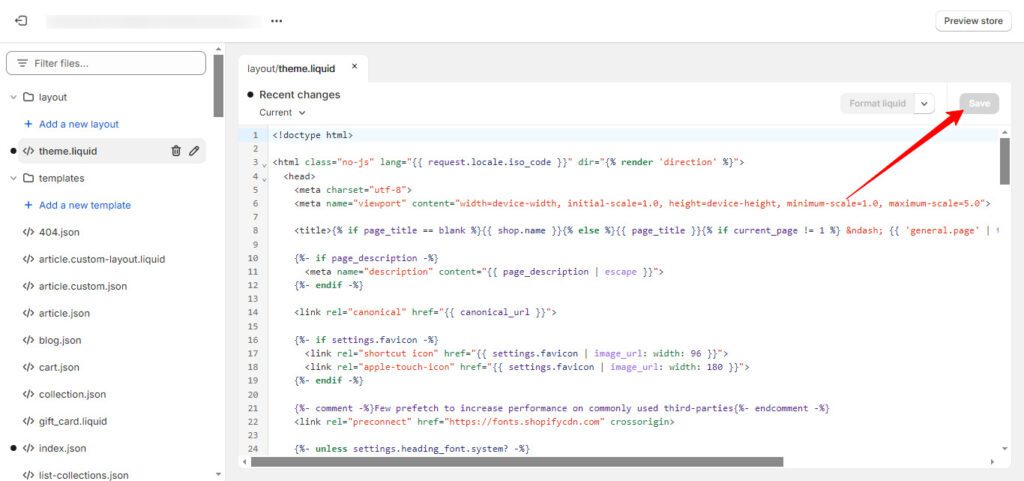
Adding Custom Code and Scripts
- Step 1: Go to Online Store > Themes.
- Step 2: Click Actions > Edit Code next to the active theme.
- Step 3: In the left-hand sidebar, the theme’s files are organized by folders (e.g., Layout, Templates, Sections, Assets).
- Step 4: To add custom scripts, navigate to the relevant file (e.g., theme. liquid for global scripts, specific section files for section-specific scripts).
- Step 5: Insert custom code within the appropriate tags, such as <script> for JavaScript or <style> for CSS.
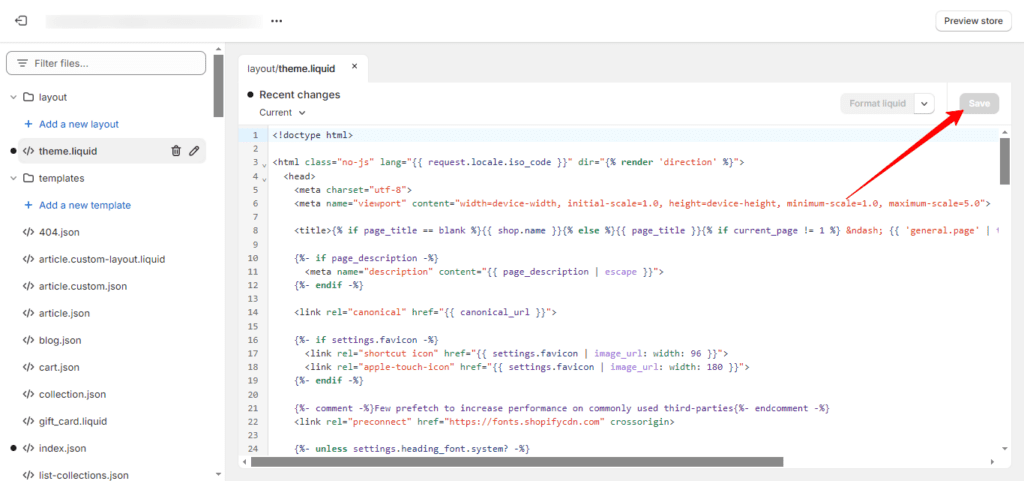
- Step 6: Click Save to apply the changes.
Also read
3. Products Management
Inventory refers to the complete list of goods and materials a business holds, including finished products, raw materials, and supplies. Proper inventory management ensures that the business has the right products available to meet customer demands while avoiding excess stock.
Product management is essential for any successful Shopify store. This guide will walk through the fundamental steps of adding, managing, organizing, and optimizing products. From creating compelling product listings to tracking inventory levels, it covers everything needed to create a better shopping experience for customers.
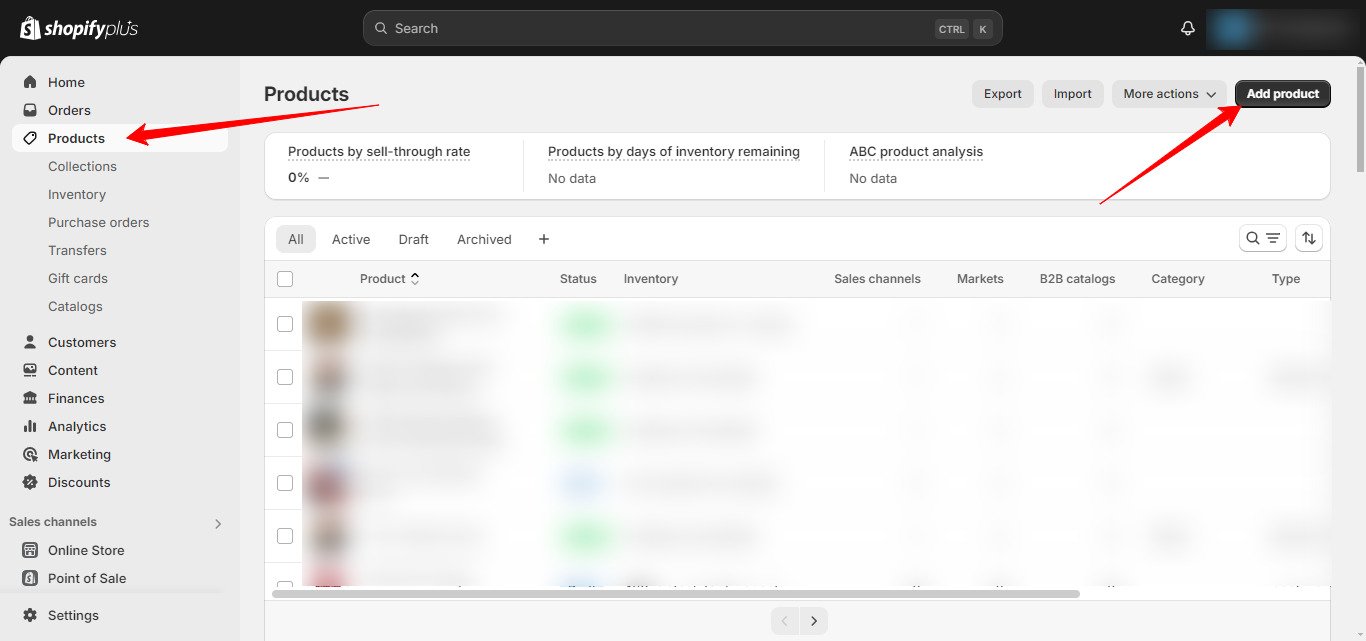
Adding a New Product
- Step 1: Log in to Shopify admin.
- Step 2: Go to Products > All products.
- Step 3: Click Add product.
- Step 4: Fill in the product details:
- Title: Enter the product name.
- Description: Add a detailed description, including features, specifications, and benefits.
- Media: Upload product images, videos, or 3D models.
- Pricing: Set the product price and compare at price if applicable.
- Inventory: Input SKU and set inventory quantity.
- Shipping: Enter the product’s weight and select shipping options.
- Variants: Set up options like size or color if applicable.
- Step 5: Set product availability by selecting the sales channels where the product should be visible.
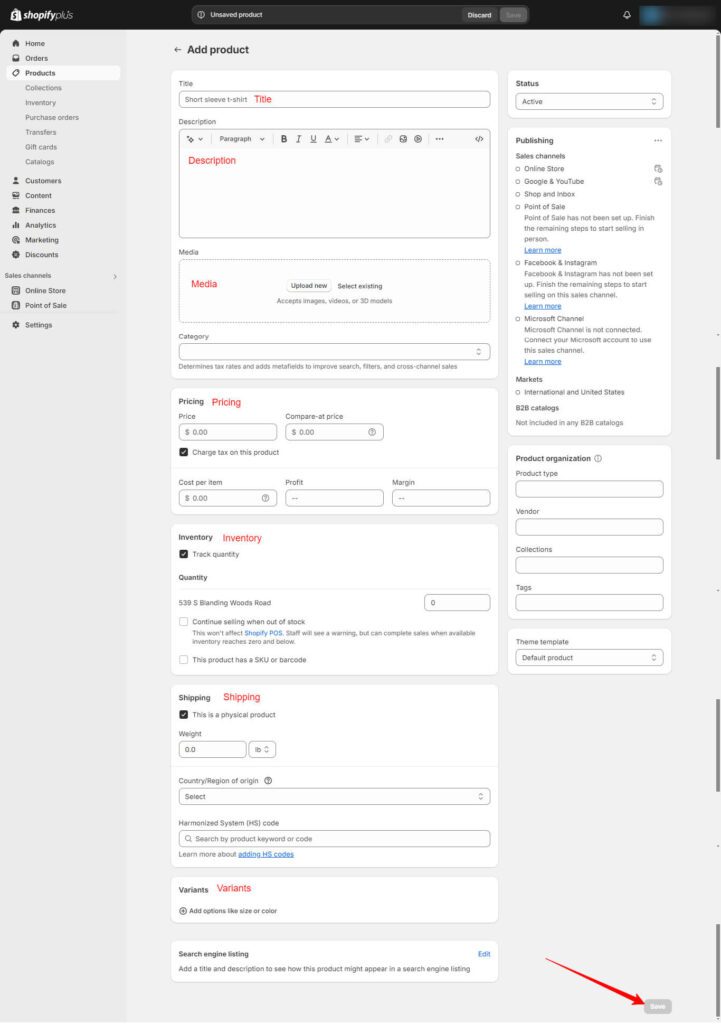
- Step 6: Once all details are filled, click Save.
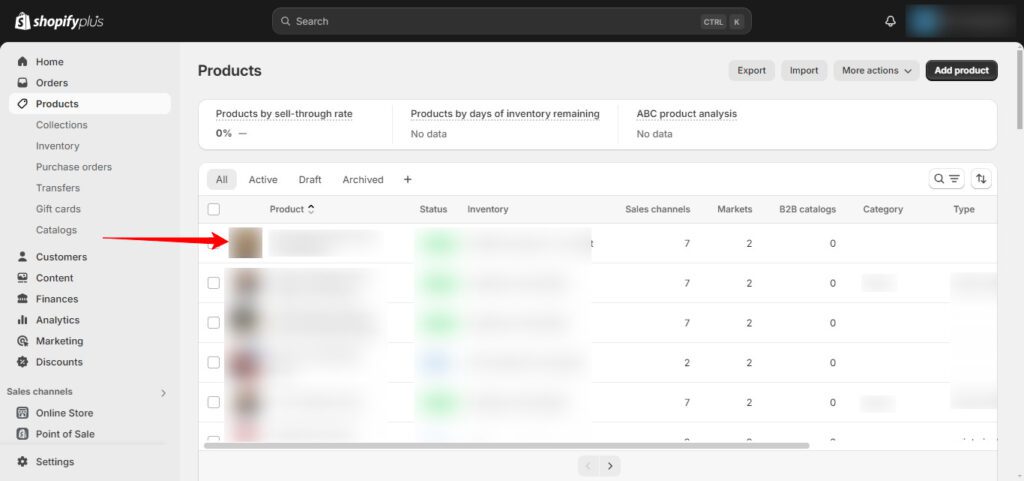
Managing Existing Products
- Step 1: Go to Products > All products.
- Step 2: Click on the product to manage.
- Step 3: Update the necessary details (e.g., price, description, inventory levels).
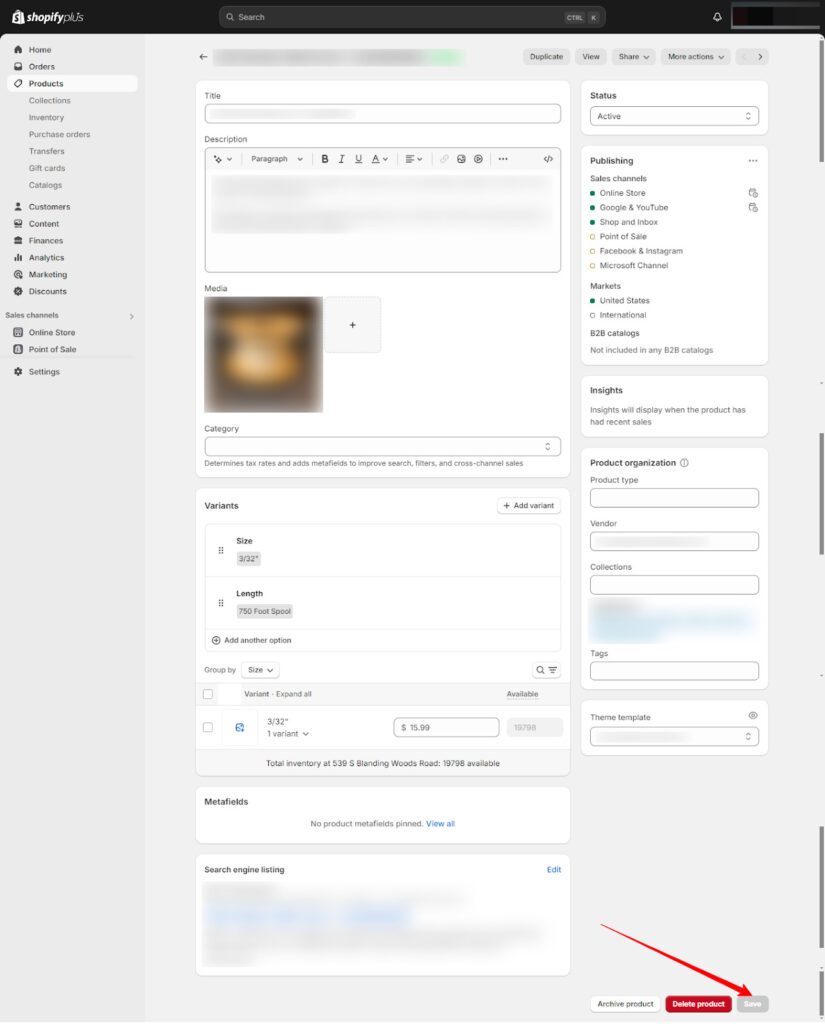
- Step 4: Click Save after making changes.
Creating a Product Collection
- Step 1: Go to Products > Collections.
- Step 2: Click Create Collection.
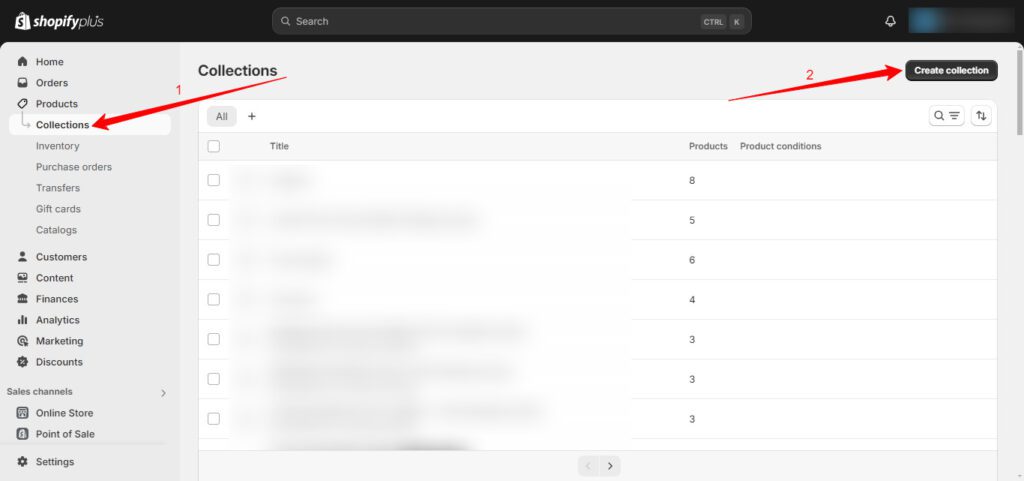
- Step 3: Name the collection and add a description if needed.
- Step 4: Choose the collection type:
- Automated: Set conditions to automatically include products in this collection.
- Manual: Add products to the collection manually.
- Step 5: Add a collection image if needed.
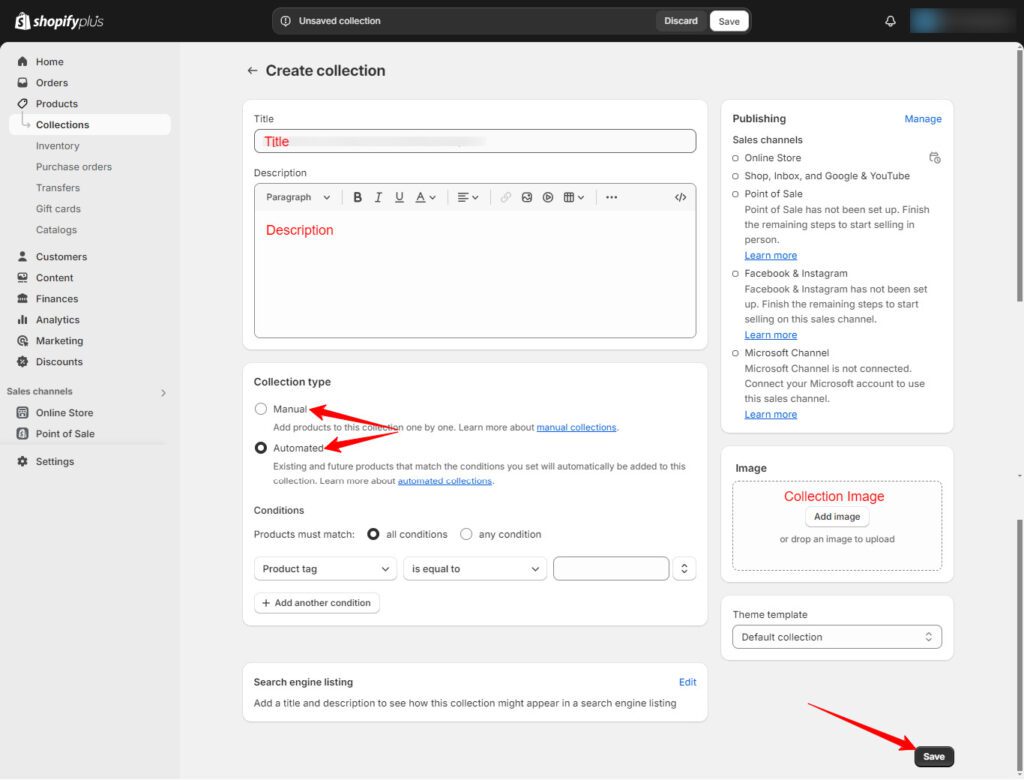
- Step 6: Click Save.
Adding Products to a Collection
- Step 1: Go to Products > Collections.
- Step 2: Click on the collection to edit.
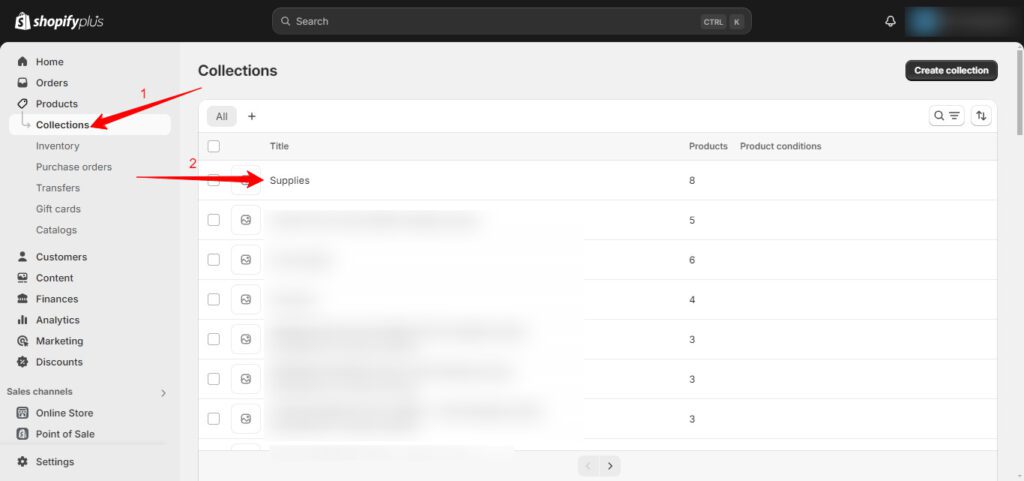
- Step 3: For automated collections, set up conditions. For manual collections, click Browse to add products individually.

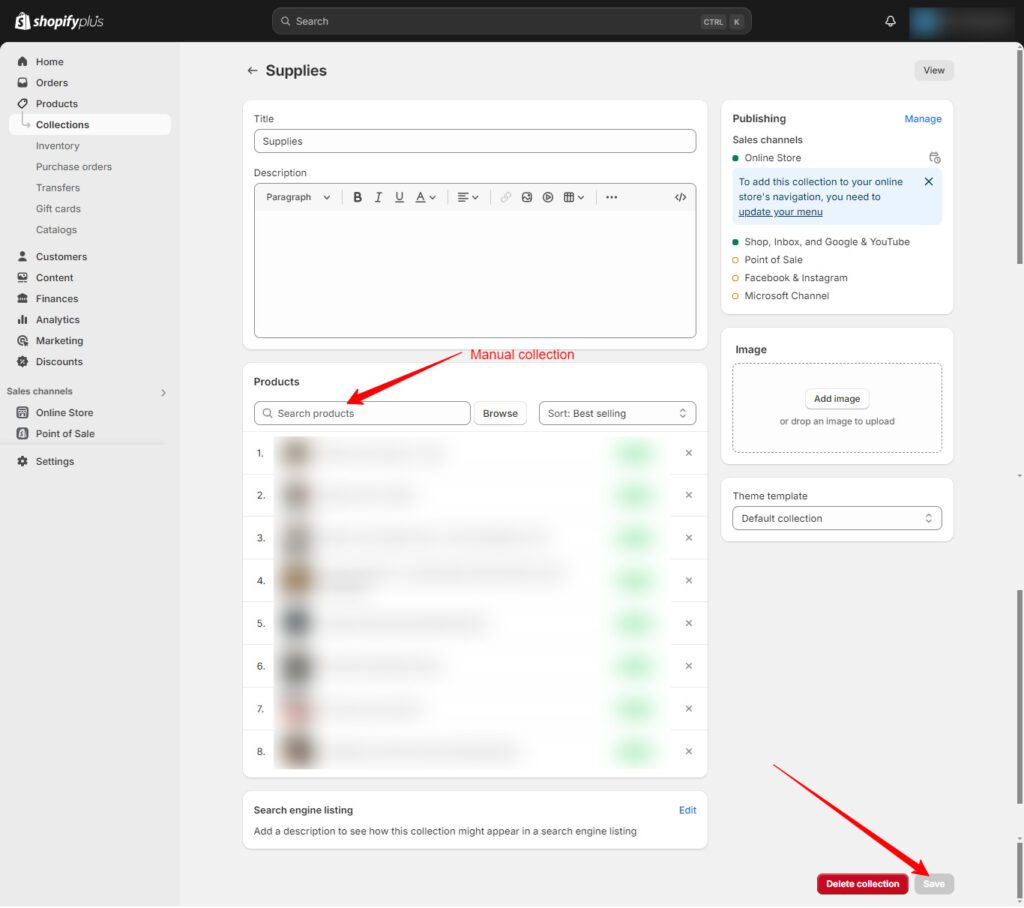
- Step 4: Click Save.
Adding Product Variants
- Step 1: Go to Products > All products.
- Step 2: Click on the product to add variants.
- Step 3: Scroll down to the Variants section and click Add Variant.
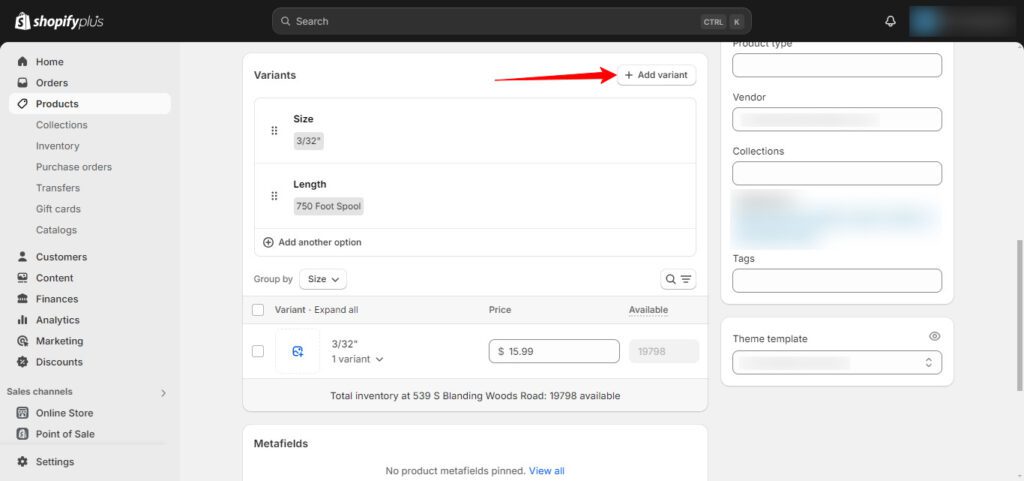
- Step 4: Enter the variant details (e.g., size, color).
- Step 5: Set prices, SKUs, and inventory levels for each variant.
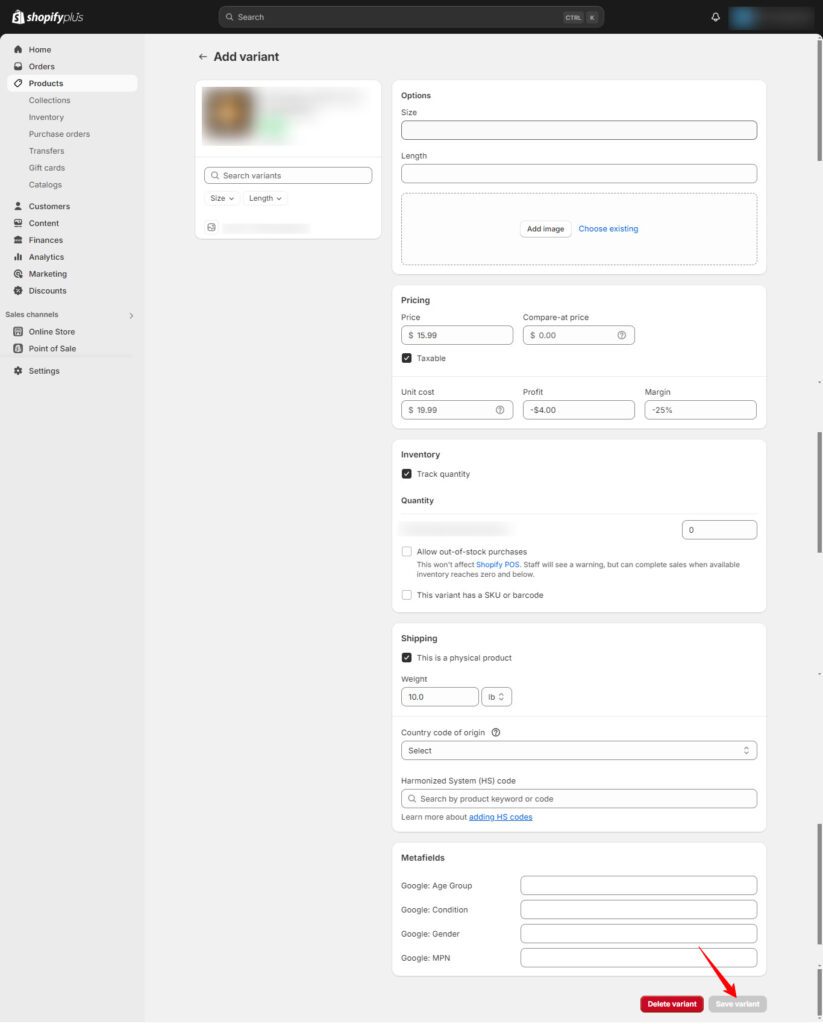
- Step 6: Click Save.
4. Inventory Management
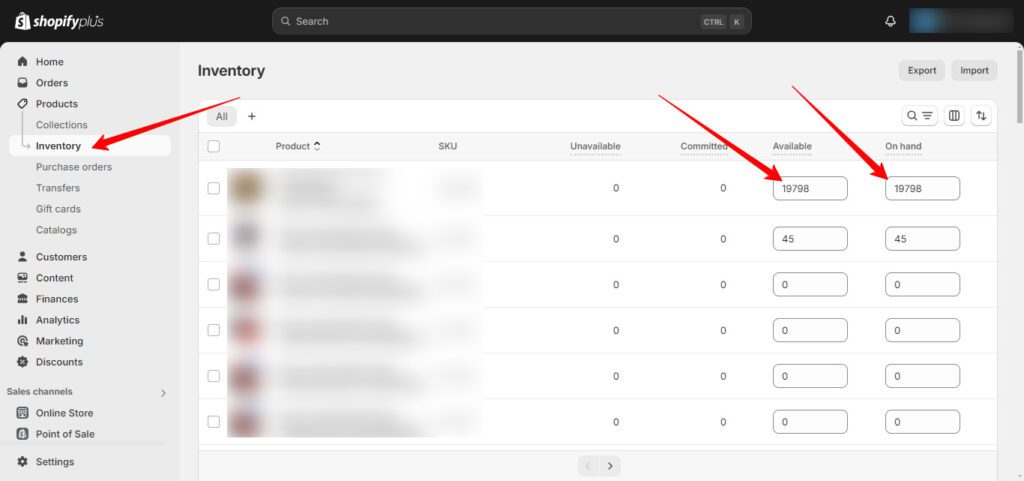
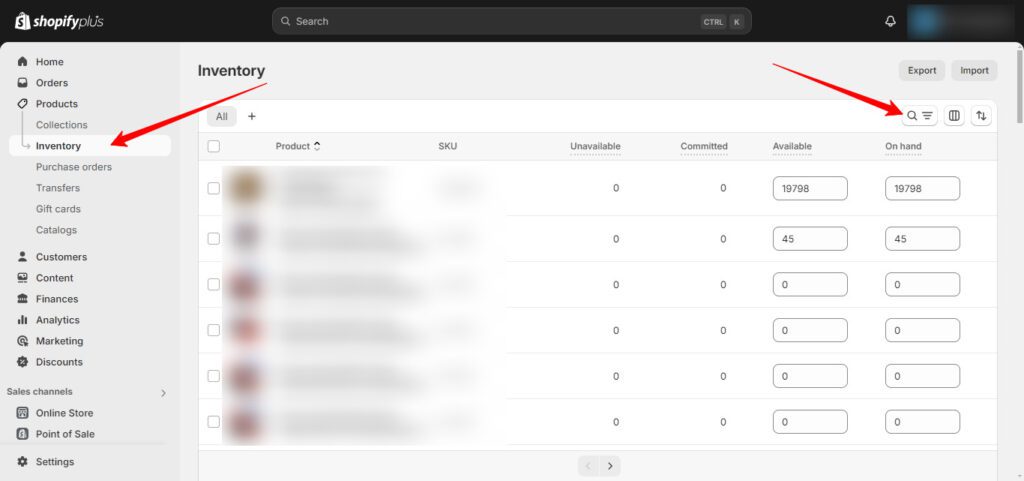
Tracking Inventory Levels
- Step 1: Go to Products > Inventory.
- Step 2: In the Inventory submenu.
- Step 3: Enter the quantity for each product in stock.
Managing Stock and Reordering
- Step 1: Go to Products > Inventory.
- Step 2: Filter by location, product, or vendor to review stock levels.
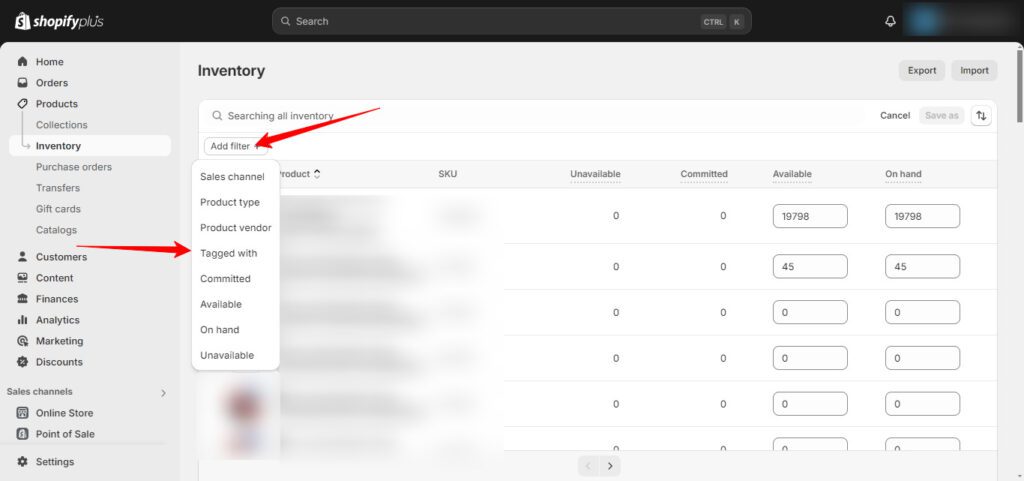
- Step 3: Identify products that are low in stock.
- Step 4: Reorder products from the supplier when stock levels exceed the desired threshold.
- Step 5: Update inventory levels once new stock arrives by editing the product or using the Inventory section.
Finalizing and Reviewing Products
- Step 1: Review all products and ensure all information, variants, and inventory levels are correct.
- Step 2: Preview how the products appear on the store by clicking View next to each product.
- Step 3: Make any final adjustments as needed, then publish the products to make them live in the store.
5. Sales and Marketing Strategies
Sales and marketing strategies are crucial for driving traffic and increasing conversions to a Shopify Plus store. Implementing the best SEO practices, social media marketing, and creating targeted email campaigns can significantly enhance the store’s visibility and customer engagement. A comprehensive SEO strategy, in particular, can help optimize the store for search engines. For a deeper understanding of SEO practices and tools, check out our blog, Shopify Plus SEO: Key Tools and Optimization Tips, where we cover everything you need to know to optimize the store’s search engine performance.
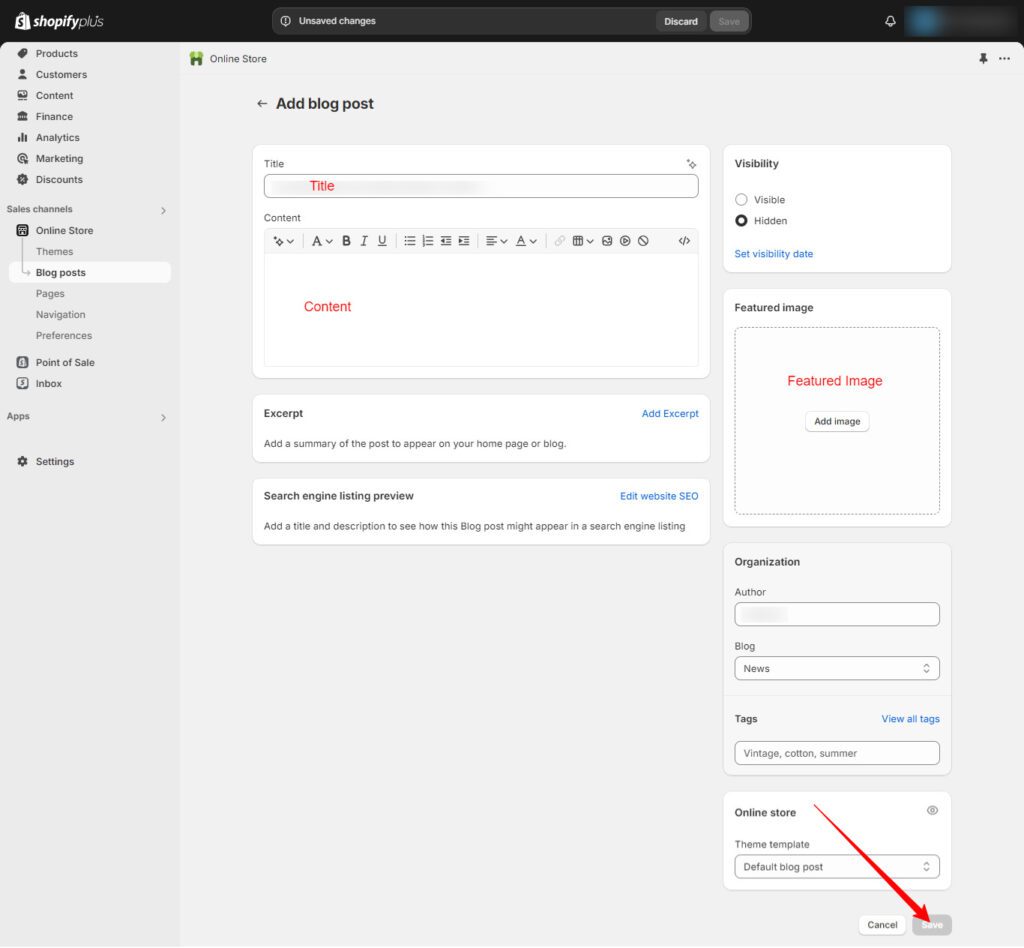
Blog Creation
- Step 1: Go to Content > Blog posts.
- Step 2: Click on the Add blog post
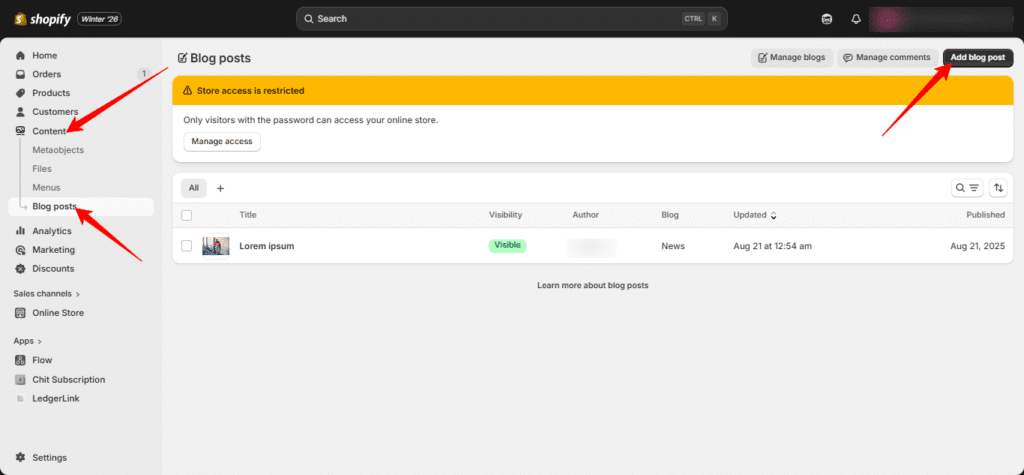
- Step 3: Write and publish an SEO-friendly blog post related to the business niche. Add the title, content, and featured image. Once everything is complete, click Save.
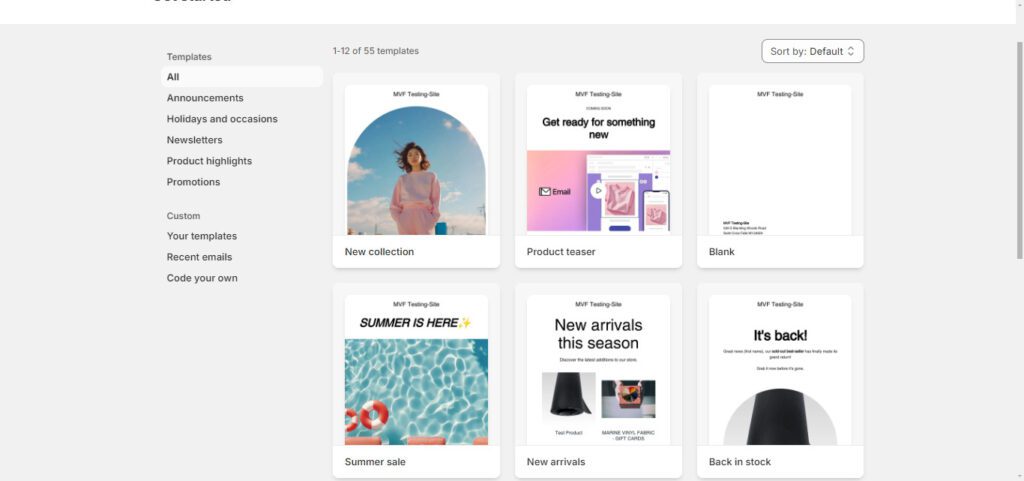
Email campaign creation
- Step 1: Go to Marketing > Create campaign
- Step 2: Use Shopify’s Email app or integrate with platforms like Mailchimp.
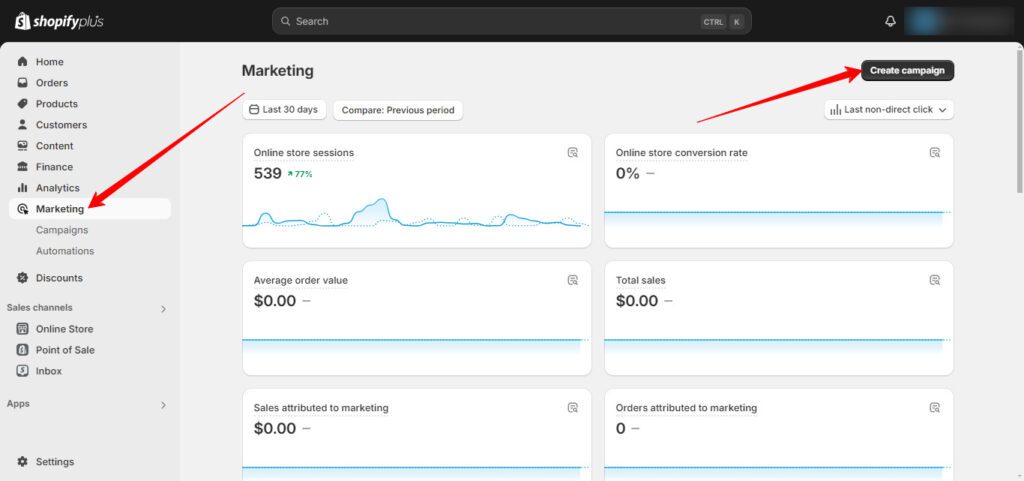
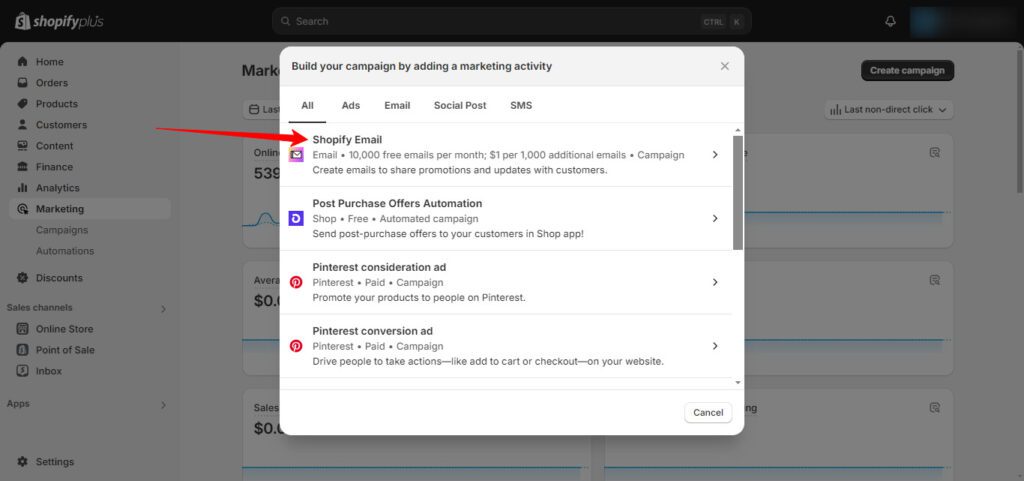
- Step 3: Choose a template and send email campaigns.
Also Read
6. B2B Features
Shopify Plus offers exclusive features for B2B businesses, including advanced tools for managing bulk orders, custom pricing, and exclusive sales channels. These capabilities streamline complex transactions, enhance customer experiences, and integrate seamlessly with existing business systems. For a deeper understanding of how Shopify Plus can revolutionize your B2B operations with detailed setup instructions and best practices, visit our dedicated blog Shopify Plus for B2B: A Complete Guide to Setup and Best Practices.
For businesses considering a migration to Shopify Plus, our guide on How to Migrate from Magento to Shopify Plus and Migrate from WooCommerce to Shopify Plus in 6 Steps provides a detailed process to ensure a smooth transition and take full advantage of Shopify Plus’s advanced features.
7. Analytics and Reporting
Analytics and reporting are vital components of managing a successful Shopify Plus store. These provide valuable insights into customer behavior, sales performance, and overall store efficiency. With Shopify Plus, access to advanced analytics and customizable reports enables store owners and developers to monitor key metrics, such as conversion rates, traffic sources, and sales trends. This data-driven approach allows for informed decision-making, helping to optimize marketing strategies, enhance the customer experience, and drive continuous growth. The platform also integrates with third-party analytics tools for even more detailed reporting capabilities.
Using Shopify Plus Analytics Tools
- Step 1: Log in to the Shopify Admin.
- Step 2: Go to Analytics from the left sidebar.

- Step 3: Click on Reports to view various reports.
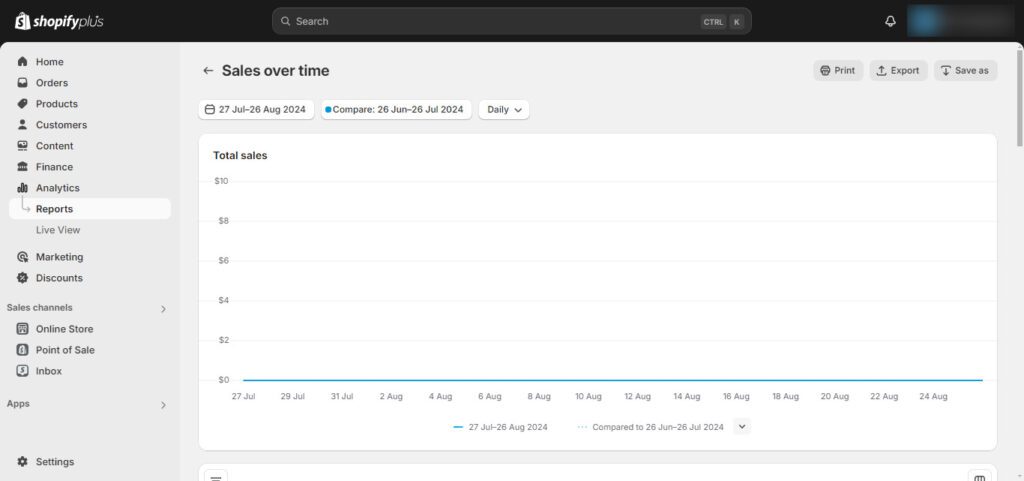
- Step 4: Review reports such as Customer Overview, Customer Retention, and Customer Behavior.
Using Segmentation
- Step 1: Go to Customers > Segments.
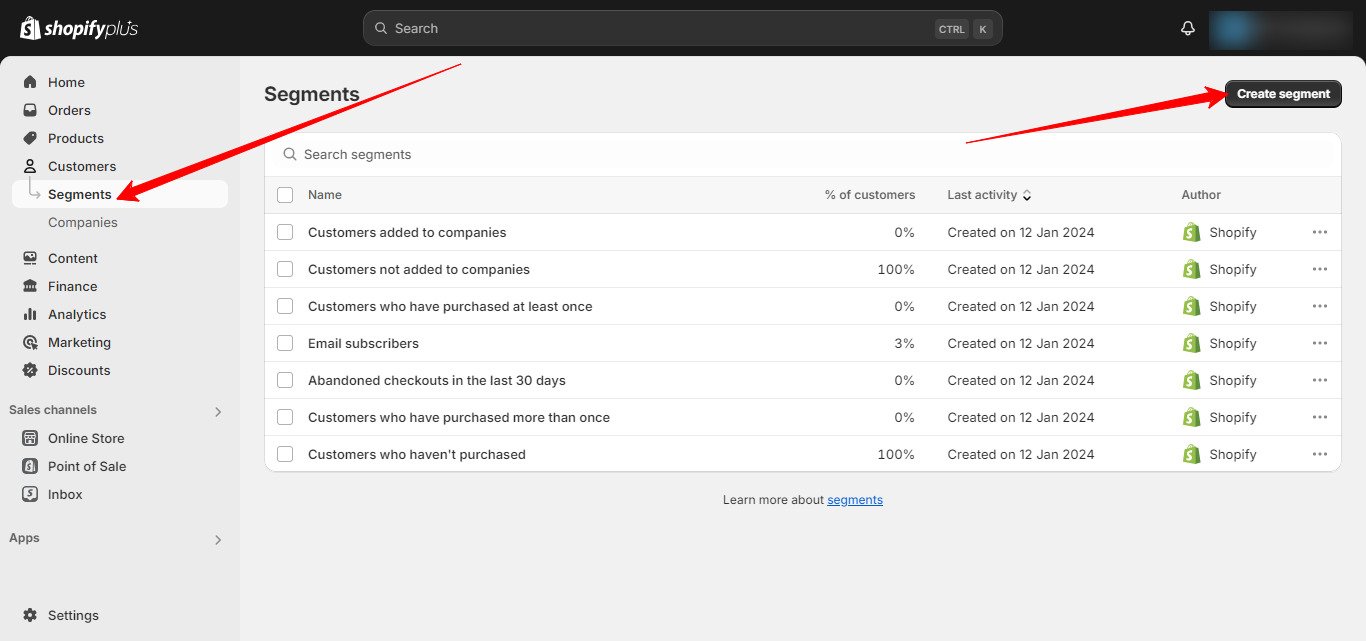
- Step 2: Create customer segments based on criteria like purchase history, location, or activity.
- Step 3: Review metrics like average order value, frequency of purchases, and customer lifetime value.
- Step 4: Use these insights to understand purchasing patterns and preferences.
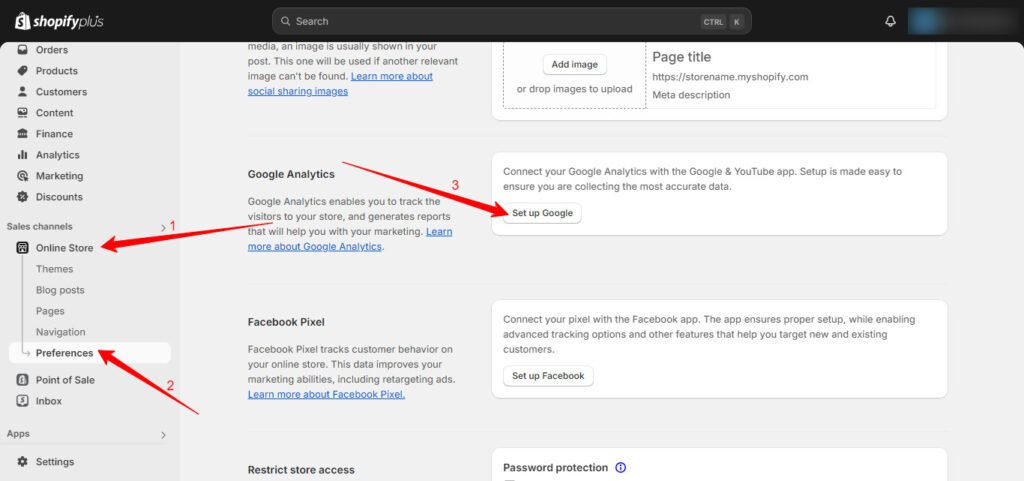
Use Google Analytics
Google Analytics is an essential tool for any Shopify Plus store, offering deep insights into visitor behavior and store performance. By integrating Google Analytics, store owners can track everything from page views and session duration to conversion rates and user flow. This data allows for a better understanding of customer behavior, helping to optimize marketing strategies, improve product offerings, and enhance the overall shopping experience.
- Step 1: Go to Online Store > Preferences.
- Step 2: Click Set up Google
- Step 3: Add the Google Analytics tracking ID.
8. Security and Compliance
Security and compliance are critical aspects of managing a Shopify Plus store, ensuring that both customer data and business operations are protected. Shopify Plus comes with advanced security features, including SSL certification, and PCI DSS compliance to safeguard sensitive information. Regular updates and security patches are automatically applied, reducing the risk of vulnerabilities. Additionally, Shopify Plus offers tools to help meet global data protection regulations, such as GDPR, ensuring that the store remains compliant with legal standards.
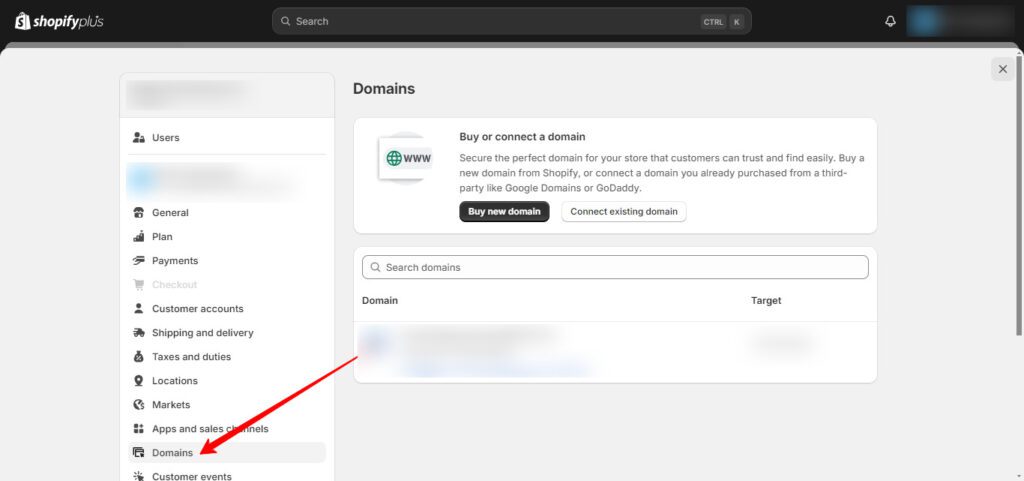
Enable SSL Certificates:
- Step 1: Go to Settings > Domains.
- Step 2: Ensure that SSL certificates are enabled for the domain (Shopify Plus provides SSL by default).
Regularly check for security updates and vulnerabilities. Use security apps or services to monitor and protect the store from threats.
Compliance with GDPR and Other Regulations
- Step 1: Go to Settings > customer privacy.
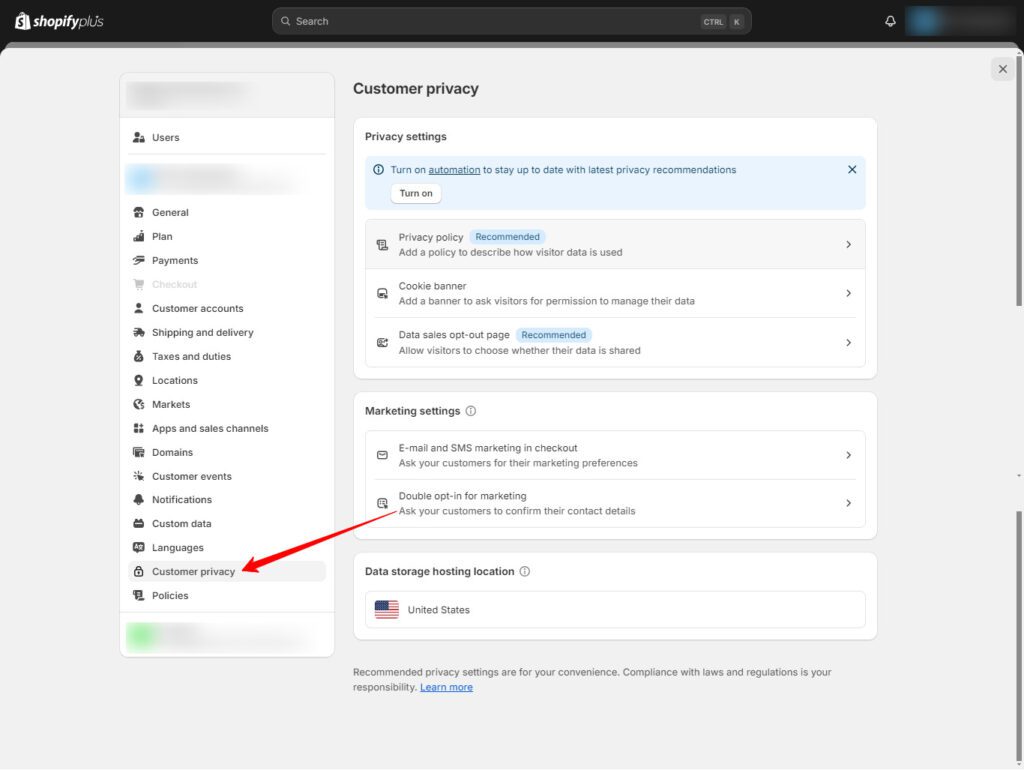
- Step 2: Review and configure the store’s privacy policy, cookie banner, etc. If required, use Shopify apps to display cookie consent banners and manage cookie preferences.
For a comprehensive guide on maintaining the Shopify store, including essential tasks and best practices, refer to our blog Essential Shopify Store Maintenance Checklist for 2026.
9. Setting up Payments
When setting up the Shopify Plus store, configuring payment options is a crucial step to ensure smooth transactions and a seamless checkout experience for the customers. Shopify Plus offers various payment gateways and methods to suit your business needs. For a comprehensive guide on how to set up payments, including detailed steps and tips, check out our blog How to Set Up Payments in Shopify? A Step-by-Step Guide for Business Owners.
Also Read
10. Managing User Permissions and Access
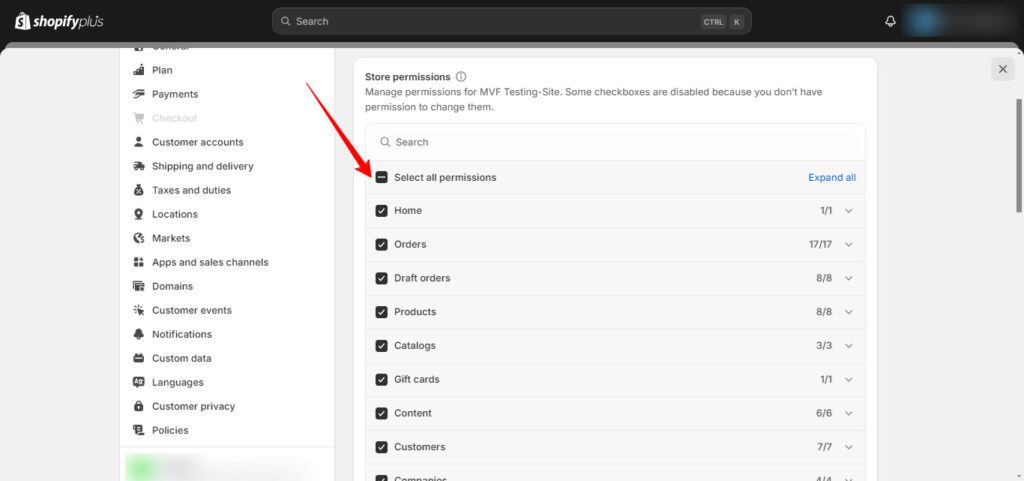
Managing user permissions and access within a Shopify Plus store is crucial for maintaining control over who can perform specific actions and access sensitive information. Shopify Plus provides tools to assign different roles and permissions to team members, ensuring that each user only has access to the features and data necessary for their role.
Set User Roles:
- Step 1: Go to Settings > Users.
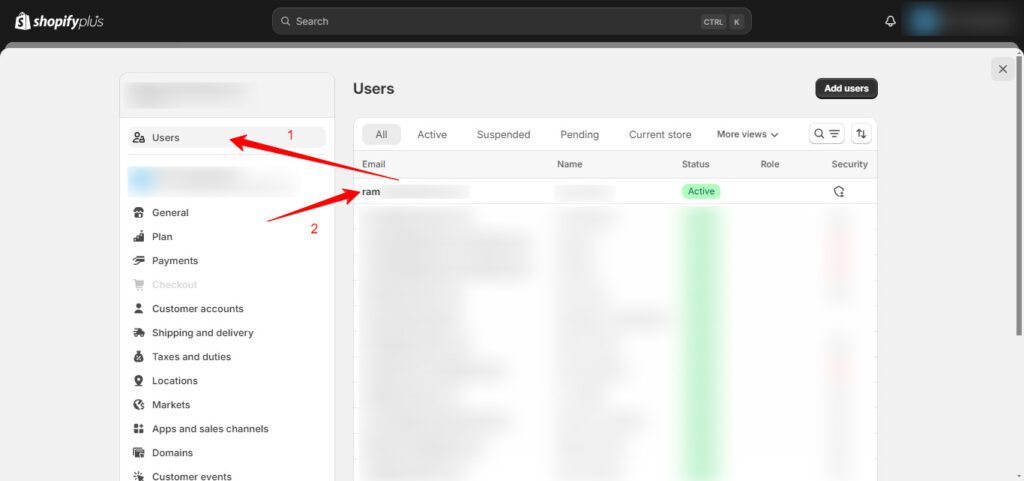
- Step 2: Review and adjust staff permissions as needed.
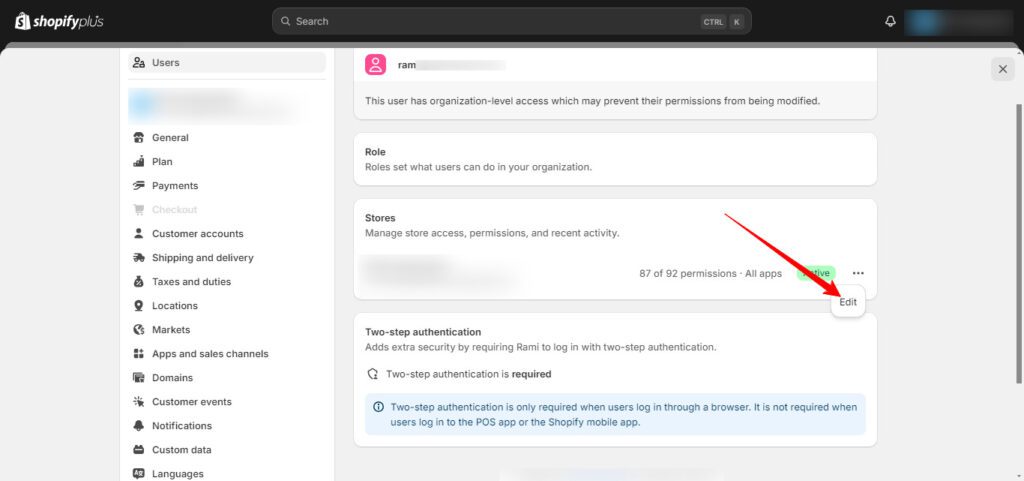
Manage Staff Accounts:
- Step 1: Go to Settings > Users.
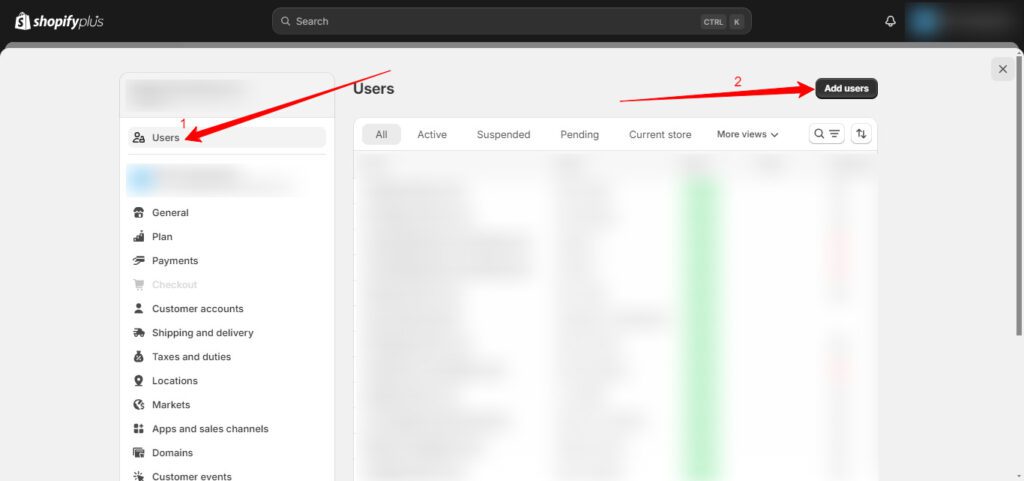
- Step 2: Add or remove staff members and assign appropriate roles and permissions based on their responsibilities.
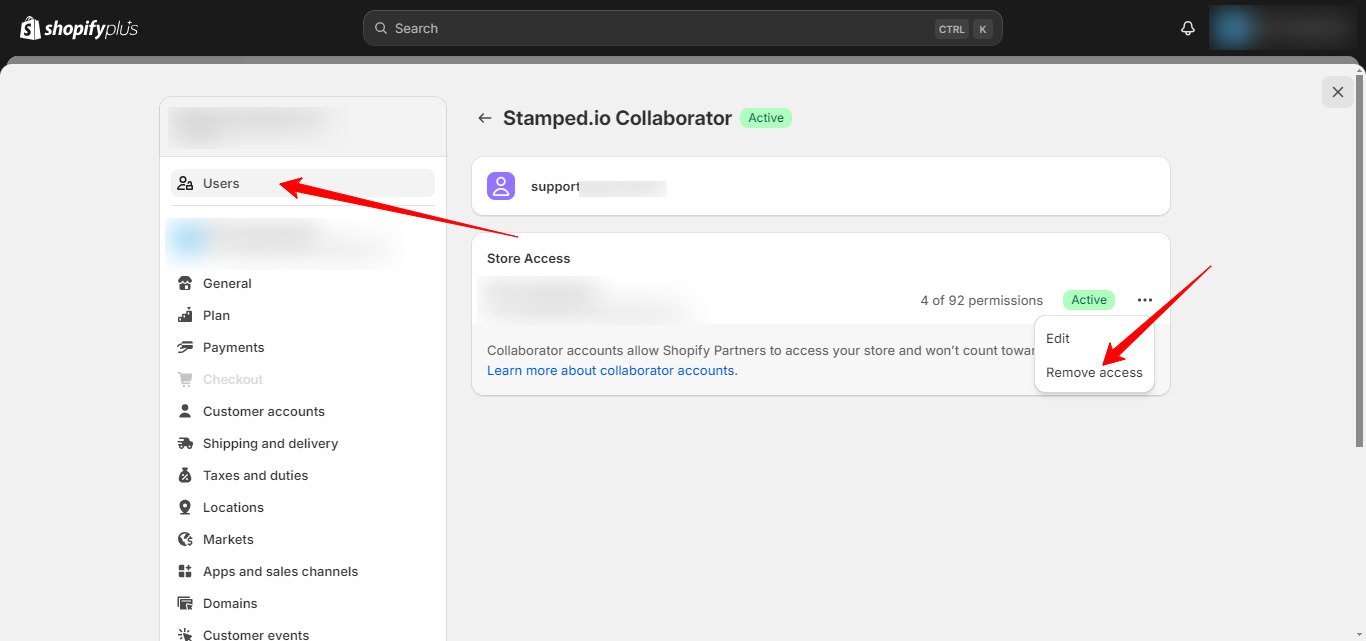
Periodically review user permissions to ensure they are up-to-date and align with current staff roles and responsibilities.
Wrapping Up
This guide has walked you through the key steps to set up and manage your Shopify Plus store effectively. From setting up your custom domain and choosing the right theme to managing products and implementing strong sales strategies, each step is essential for building a successful online store. By using advanced features like analytics, security, and user permissions, you can keep your store secure and perform well. Plus, with effective marketing and SEO, you’ll attract more visitors and boost sales.
ColorWhistle offers expert Shopify development services to meet unique business needs. Whether you’re looking to set up a new Shopify Plus store, customize your existing setup, or optimize your online presence, our team of skilled developers is here to help you achieve your e-commerce goals. Get in touch with us at +1 (919) 234-5140 to discuss how we can enhance your Shopify experience.
What’s Next?
Now that you’ve had the chance to explore our blog, it’s time to take the next step and see what opportunities await!


I found your guide on Shopify Plus store development very insightful. It offers a comprehensive look at building and optimizing a Shopify Plus store, making it a valuable resource for businesses scaling their eCommerce operations.
Thanks for sharing this useful information!