Visuals can transform data into engaging stories that attract and influence audiences. In today’s world, digital marketing team deal with a huge amount of information. It can take a lot of work to pull out valuable insights from this overload. For instance, a digital marketing agency might need help figuring out how different campaigns affect sales because of the many spreadsheets and disconnected data.
A recent study shows that data analysts use more than half of their time on cleaning and preparing data instead of finding insights. To solve this challenge and maximize data use, Looker Studio plays a key role by converting raw data into meaningful visual stories. By leveraging digital marketing services that include advanced data visualization tools like Looker Studio, businesses can streamline their processes and focus more on strategy and growth.
What is Looker Studio?
Looker Studio is a data visualization tool that enables users to create interactive reports and dashboards. It allows you to connect to various data sources, transform data into meaningful visuals, and share insights with stakeholders. It helps you change raw data into valuable insights that lead to action.
What will be Your Takeaways from this Post?
Maybe, you’re a Data Analyst, Marketer, Business Owner, part of a Data-driven team, or a Researcher, using Looker Studio, just say goodbye to the boring Excel sheets and cleave to a more creative & engaging report generation approach.
Join us in this post as we explore the essential functionalities of Looker Studio and guide you through the process, starting from signing up to sharing the generated reports. Let’s dive in.
Did you know?
People can retain 65% of the information three days after watching an image with data compared to 10% of the information they hear.
Key Features Of Looker Studio
1. Drag-and-Drop Interface
Looker Studio features an easy-to-use drag-and-drop interface that makes creating reports simple. Users can quickly put together charts, tables, and other visuals without knowing how to code. This easy method quickens the process of making reports and lets users pay more attention to the data instead of worrying about technical aspects.
2. Data Connectors
The platform features numerous data connectors, which help users integrate data from several sources. This includes options like Google Analytics, Google Sheets, BigQuery, and additional platforms. By linking to different data sets, users can create in-depth reports that reflect their business performance as a whole.
3. Customization Options
It gives users a lot of options to customize reports for their specific needs and branding. You can adjust colors, fonts, and layouts to match your organization’s identity. The platform also includes various chart types and formatting tools to help make reports visually appealing and full of information.
4. Collaboration Features
It fosters collaboration by enabling multiple users to work on reports simultaneously. Users can share reports, provide comments, and make edits, facilitating efficient teamwork. This feature is particularly valuable for teams that require real-time data insights and shared decision-making.
Also Read
Why Is Data Visualization Important?
Data visualization is crucial for several reasons:
- Faster comprehension: Visuals convey information more quickly than text, which speeds up our understanding of complex data.
- Identification of patterns and trends: Images can show patterns and trends that you might not see in plain data.
- Effective communication: Visuals can express detailed information clearly and straightforwardly to a large group.
- Data-driven decision-making: By showing key insights, data visualization aids in making smart choices.
- Storytelling with data: Pictures can transform data into engaging stories that grab attention and persuade people.
Looker Studio: Notable Key Updates for 2025
Custom Value Formatting: Define how values appear in charts directly in Looker Studio using Google Sheets-style notation, without extra SQL queries.
Download and Third-Party Access Controls: Administrators can manage permissions to control downloads and restrict third-party connectors and visualizations in reports.
Organize with Folders in Team Workspaces: Use folders and subfolders to organize reports and data sources within team workspaces.
Display Field Descriptions in Table Charts: Enable tooltips to show field descriptions in table charts, automatically activated for Looker or Search Ads 360 data sources.
Viewer Role for Team Workspaces: Assign the Viewer role to team workspace members, allowing them to view assets, folders, and Trash.
Pro Feature: Scheduled Report Deliveries for Viewers: Pro users can grant Viewers permission to schedule report deliveries, improving accessibility and collaboration.
Create Looker Studio Reports in Google Sheets: Generate Looker Studio reports directly from Google Sheets using the extension, simplifying report creation from sheets or ranges.
Timeline Chart Option: Visualize event relationships and compare their durations with the new timeline chart feature.
Expanded Data Label Customization: Customize data labels extensively in area, bar, column, line, combo, and time series charts with new options for font, color, style, and more.
Gemini Features in Public Preview: Access public preview Gemini features, including creating calculated fields without formula knowledge and adding Looker Studio content to Google Slides.
New Log Event Attributes: New log event attributes help admins audit and monitor user interactions with schedules and alerts.
New Partner Connectors: Looker Studio’s Connector Gallery now includes new partners like Adobe Commerce, CallTrackingMetrics, Piano Analytics, ClickUp, TikTok, WooCommerce, and Apresenta.me, Semantic SEO Data, and Piwik PRO Analytics.
1. Getting Started with Looker Studio

- Creating a New Report: Begin by creating a new report that will show all your data. Imagine it as a blank canvas ready for your data visuals.
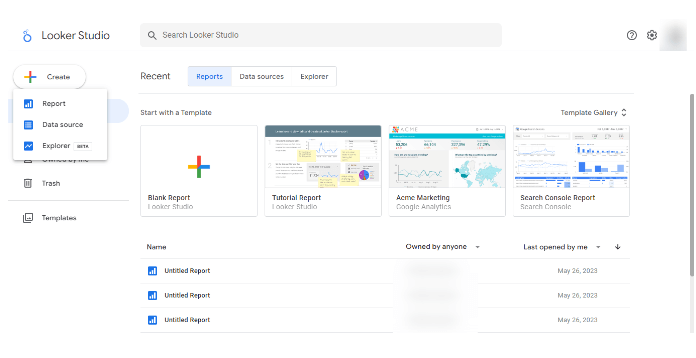
- 2. Connecting Data Sources: After that, connect your data sources, such as Google Analytics or Google Sheets, to Looker Studio. This gives the platform permission to view the data you are interested in.
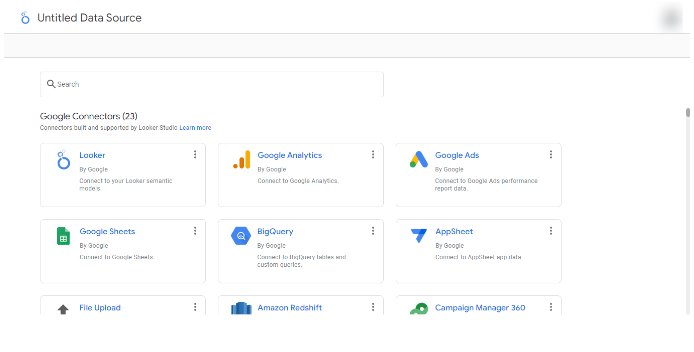
- 3. Understanding Data Fields and Dimensions: At last, you will understand the different types of data you will work with. Data fields are the exact pieces of information, like sales numbers, and dimensions are the categories or labels that help you arrange this data, such as date or product type.
By the end of this step, you’ll have a basic report ready with data flowing in, setting the foundation for deeper analysis.
Did you know?
According to the University of Minnesota, the human brain processes visuals 60,000 times faster than textual information, making visual communication remarkably valuable.
2. Building Effective Visualizations
Your data is ready in Looker Studio, so now you can create visuals that help make it clear. Here’s what to do:
- 1. Finding the Right Type of Chart: Different data types are best shown with certain charts. Line charts are effective for illustrating trends over time, and pie charts are suitable for comparing parts of a whole. You can choose the right chart type from the available templates to make your data clearer and more engaging.

- 2. Customizing Charts and Tables: After selecting your chart, you can modify it to suit your preferences. This may involve altering colors, adding labels, or resizing parts to ensure your visual is clear and emphasizes key information.
- 3. Adding Interactive Elements: Features like filters or date range selectors can make your report more interesting. These interactive options enable users to dive into the data and see what they want.
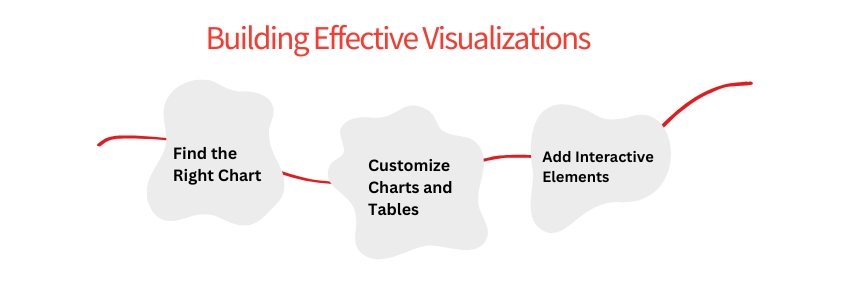
By following these steps, you can create appealing visuals and simplify the understanding and use of your data.
Also Read
3. Creating Engaging Dashboards
The last step is to combine all your visuals into an interesting dashboard. Here’s how to make it helpful and attractive:
1. Designing a Clear Layout: First, set up your dashboard so it’s simple to use—position the most crucial information at the top or center, and group similar visuals. A clear design helps viewers understand the data fast and avoids overwhelming them.
2. Using Filters and Controls: Add filters and controls to your dashboard for better interactivity. These options help users access specific details by picking different choices, such as analyzing data for a particular date range or focusing on a certain product category. This change makes the dashboard more dynamic and accessible.
3. Adding Storytelling Elements: To make your dashboard more interesting, try adding features that create a narrative with your data. You could use a striking headline to showcase a major trend or a concise description to lead viewers through the information. These storytelling aspects help users see not just the data itself, but also its importance.
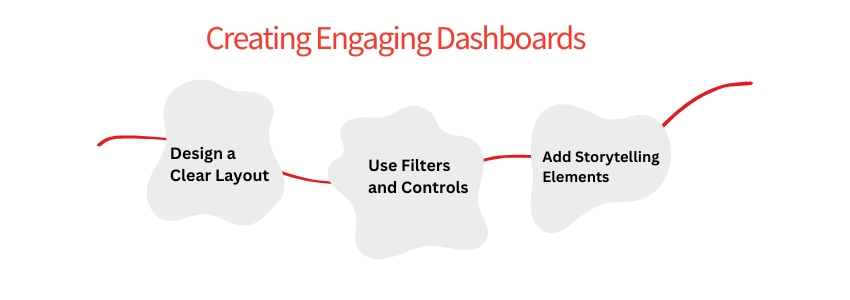
These steps will help you design a dashboard that is more than just a set of charts. It will serve as an effective tool to convey your data.
Best Practices for Data Visualization
To make your data visualizations truly impactful, follow these best practices:
- Tips for Effective Data Storytelling: Ensure your visuals do more than show data; they need to tell a story. Highlight the key insights, use clear visuals, and lead your audience through the information. This helps viewers grasp the meaning behind the numbers.
- Ensuring Data Accuracy and Consistency: Review your data to ensure it is accurate and matches all visuals. Incorrect data can result in false conclusions, so always check your sources and calculations. Consistency also involves maintaining the same style and format throughout the report for a polished appearance.
- Sharing and Collaborating on Reports: After finishing your visualization, share it with others. Looker Studio simplifies collaboration by letting you grant access to your team members. You can collaborate, gather feedback, and update as needed. Sharing your report keeps everyone aligned and able to use the insights effectively.
By following these best practices, you’ll create data visualizations that are clear, reliable, and useful for making informed decisions.
FAQs about Looker Studio
1. Is Looker Studio free?
Yes, Looker Studio is available for free. You won’t have to pay any subscription fees or costs to use its main features.
2. Which data sources can I connect to in Looker Studio?
Looker Studio offers many data connectors, including Google Analytics, Google Ads, Google Sheets, and Google Search Console. Additionally, you can use community-created connectors or make custom ones to pull data from other sources.
3. Is it possible to schedule automatic data updates in Looker Studio?
Looker Studio allows you to schedule data refreshes. This ensures your reports refresh automatically at specific times, giving you the most recent data available.
4. Does Looker Studio provide mobile access to reports?
Yes, Looker Studio reports can be easily viewed on mobile devices. This feature lets you access your reports anytime and share them with those who enjoy mobile access.
5. Are there any limitations in Looker Studio?
While Looker Studio is powerful, it has some limitations. For instance, it may sample data from large datasets and limit the number of data sources in a report. It’s wise to consult the official documentation or forums for the latest updates on these limitations.
Wrapping Up
This guide provides the fundamental steps to get going with Looker Studio, including how to create your initial report and develop engaging dashboards. We also covered best practices for effective data visualization, making sure your insights are clear and impactful. As you work with Looker Studio, you can explore its features further at your own pace. Experiment with various visualizations, sharpen your storytelling skills and work with others to get the best out of your data.
Explore our ColorWhistle page to discover how our digital marketing services can elevate your brand. Have questions? Reach out at +1 (919) 234-5140, or send a message and we’ll be ready to assist.
What’s Next?
Now that you’ve had the chance to explore our blog, it’s time to take the next step and see what opportunities await!
