Creating Interactive 3D Visualizers in WordPress Using Three JS

Powered by an expert content team, this blog blends SEO precision with compelling storytelling. Every insight is supported by data-driven research, ensuring content that ranks, engages, and drives conversions.
Our authors are proven experts in their fields, writing on topics where they have demonstrated expertise. Every piece of content undergoes peer review and validation by industry professionals.
AI Summary
Key Highlights of Interactive 3D Visualizers with Three.js
This post explores how to create interactive 3D visualizers in WordPress using Three.js, a powerful JavaScript library that simplifies WebGL graphics rendering. The key insight: integrating Three.js with WordPress enables developers to craft dynamic, engaging 3D scenes that enhance user experience and attract wider audiences. The article guides readers through setup, scene creation, rendering, and animation steps, emphasizing cross-browser compatibility and performance. It targets designers and developers seeking to elevate website design with immersive visuals. Readers gain practical knowledge to start building 3D elements, encouraging further exploration of advanced features for richer web interactivity.
Creating a Three.js scene resembles the art of filmmaking: you establish the backdrop, sculpt the scene’s components, introduce lighting and effects, choreograph the movement, and captivate the audience with interactive elements. The outcome is a mesmerizing 3D experience that seamlessly unfolds within the confines of a web browser.
Smooth design is undoubtedly appealing, but the introduction of 3D visualizers elevates website design layouts to a whole new dimension. Nowadays, websites featuring dynamic 3D graphics and interactive scenes have moved to the forefront of web design trends. In response to this growing demand, many businesses are increasingly seeking out these captivating designs for their websites, making it a must-have feature in their websites. By incorporating 3D design elements into your WordPress websites, you can attract a broader audience. Fortunately, tools like Three.js are readily accessible resources that help both designers and developers seamlessly integrate bespoke 3D elements into their website creations.
Did You Know?
82% of product page visitors have an active 3D view.
The fusion of Three.js and WordPress heralds a new era in web development, where immersive 3D visualizers take center stage. Three.js, a versatile JavaScript library, empowers developers to craft dynamic 3D experiences, while WordPress provides a robust platform for website creation and management. By combining these technologies, you can create engaging and interactive 3D elements that enhance your WordPress website’s user experience.
Why Three.js for WordPress Website?
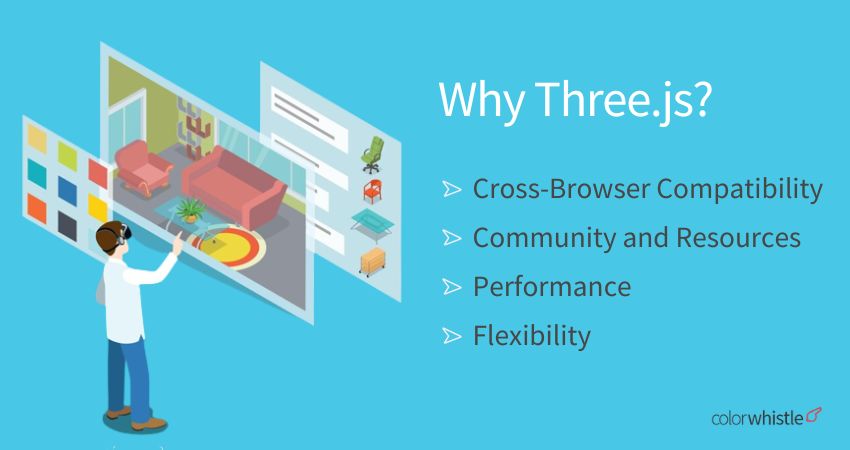
Before getting into the details, you might be wondering: “Why should we use Three.js?” The answer is simple: Three.js opens up a world of possibilities for creating captivating user experiences. Here are a few reasons to consider:
- Cross-Browser Compatibility: Three.js abstracts the complexities of WebGL, ensuring that your 3D scenes work smoothly across different browsers.
- Community and Resources: It boasts a thriving community and abundant resources, including tutorials, documentation, and a wide array of pre-built components.
- Performance: Three.js is optimized for performance, making it possible to render complex 3D scenes even on lower-end devices.
- Flexibility: You have full control over your 3D environment. Whether you’re building a game, a product configurator, or a virtual tour, Three.js adapts to your needs.
By employing the ‘import’ statement at the beginning of a JavaScript (JS) program, you gain access to an array of JS libraries. Among these, Three.js stands out as a JavaScript library designed to streamline the process of coding and crafting animated 3D visuals within a web browser environment. Leveraging the power of WebGL, a web graphics technology, Three.js empowers developers to seamlessly render interactive 2D and 3D graphics, akin to what an HTML canvas achieves, directly within a web browser
Also Read
Steps to Create Interactive 3D Scenes with Three.js
Did You Know?
According to NMSC, the global visualization and 3D rendering software market was valued at 1.63 billion U.S. dollars in 2019. By 2030, the market is forecast to have a value of 9.61 billion U.S. dollars.
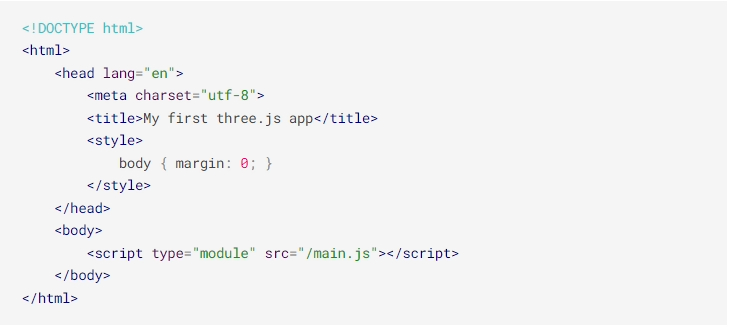
Step 1: Setting Up Your Development Environment
Every Three.js development requires an HTML file for webpage definition and a JavaScript file to execute your Three.js code. Once you’ve established the fundamental project structure, the next step involves enabling local development and accessing your project via a web browser. This can be achieved by either leveraging NPM and a build tool for installation and local development or opting for the straightforward approach of importing Three.js from a CDN.
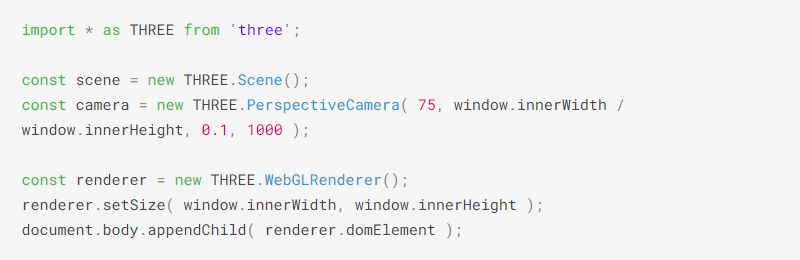
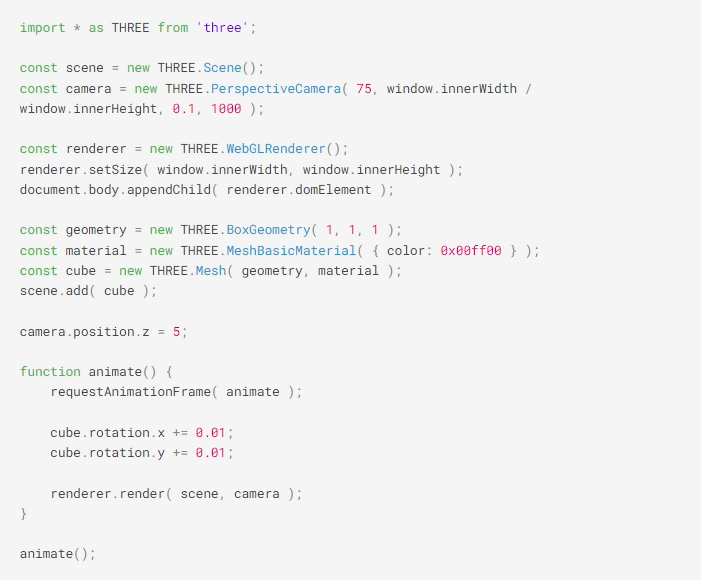
Step 2: Creating a Scene
To effectively showcase content using Three.js, we must have three essential components in place: a scene, a camera, and a renderer. These elements work in rapport to enable the rendering of the scene from the perspective of the camera. Here, we will start by setting up a scene, with a spinning cube.
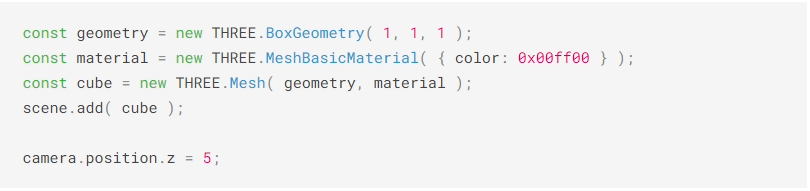
To create a cube,
Step 3: Rendering the Scene
This initiates a continuous loop, prompting the renderer to redraw the scene each time the screen refreshes, typically occurring at a rate of 60 times per second. One crucial benefit of “requestAnimationFrame” is its ability to pause automatically when the user switches to another browser tab. This thoughtful feature conserves their valuable processing resources and extends battery life.

Step 4: Animating the Cube
To enhance the visual appeal, let’s introduce some dynamic motion by adding the following code just above the ‘renderer.render’ function call within your ‘animate’ function.

This code snippet executes during each frame render, typically occurring at a rate of 60 times per second, imparting an engaging rotation animation to the cube. Essentially, any elements you wish to manipulate or transform while the application is active should be encapsulated within the ‘animate’ loop. You can, of course, invoke other functions from within this loop to maintain a well-structured and concise ‘animate’ function.
Result
The complete code is below, this should help to create a 3D element to your website.
Also Read
Creating Interactive 3D Visualizers in WordPress using Three.js
Did You Know?
95% of respondents prefer interactive 3D view to video playback.
Now, let us see an overview of creating interactive 3D visualizers with Three.js and WordPress,
Setting Up Your Development Environment
Before diving into the world of 3D visualizers, it’s crucial to establish a solid development environment. This includes selecting a capable code editor, installing Node.js for managing dependencies and enabling a local development server, and ensuring you have the Three.js library at your disposal. A well-configured environment sets the stage for a smooth and efficient development process.
Planning Your 3D Visualizer
The success of any 3D project begins with thoughtful planning. Sketch out your vision, define the scope of your 3D visualizer, and consider the user experience you want to deliver. Pay attention to design aesthetics, user interactions, and the overall narrative you wish to convey through your 3D content. Comprehensive planning ensures that your project stays on track and aligns with your objectives.
Creating Your 3D Content
To bring your 3D visualizer to life, you’ll need to create the core 3D content. Utilize 3D modeling software like Blender or Maya to design and sculpt your 3D elements. These tools allow you to craft intricate 3D models and scenes that align with your project’s vision. Export your creations in compatible formats such as .glb or .gltf for seamless integration with Three.js.
Configuring Your WordPress Environment
Your WordPress environment serves as the canvas for showcasing your 3D visualizer. Ensure that you have WordPress installed and configured according to your project’s needs. Select an appropriate WordPress theme or create a custom one if you have the expertise. Prepare your platform to accommodate the 3D elements you’ll be integrating.
Managing 3D Models on WordPress
Efficiently managing your 3D assets within WordPress is essential for organization and accessibility. Consider implementing custom post types dedicated to 3D models. You can achieve this using plugins like “Custom Post Type UI” or by adding custom code to your theme’s functions.php file. This streamlines the process of uploading, organizing, and referencing your 3D models within the WordPress ecosystem.
Building a Custom Page Template
Creating a dedicated page template on WordPress is crucial for seamlessly embedding your 3D visualizer into your website. Duplicate your theme’s existing page template and customize it to accommodate your Three.js code. This custom template provides the canvas where your 3D magic will unfold within the familiar WordPress framework.
Integrating Three.js
The heart of your 3D visualizer lies in the integration of Three.js into your WordPress project. Configure your custom page template to load the Three.js library and set up the essential components such as the scene, camera, and renderer. This step bridges the gap between the WordPress content management system and the interactive 3D environment you’re creating.
Interactivity and Animation
Engaging your audience is paramount in 3D visualizers. Enhance the user experience by adding interactivity and animations. Implement user controls, mouse interactions, or even complex animations to make your 3D content come to life. The “animate” function, running at a standard 60 frames per second, serves as the heartbeat of your interactive 3D world.
Optimization and Fine-Tuning
Ensuring that your 3D visualizer runs smoothly and responsively is essential for a seamless user experience. Optimize your WordPress website by leveraging techniques such as asset caching, code minification, and performance tuning. Regularly update the Three.js library and WordPress plugins to stay current with the latest features and security enhancements.
Showcasing Your 3D Visualizer
With your 3D visualizer polished and refined, it’s time to present it to your audience. Create a dedicated WordPress page and assign your custom page template to it. By publishing this page, you make your interactive 3D masterpiece accessible to website visitors, allowing them to explore and engage with your captivating 3D content.
Ready to take your website to the next level with 3D visualizer?
The symmetrical integration of Three.js and WordPress opens doors to a realm of possibilities in web development. This article would have helped you to understand how to create immersive and interactive 3D visualizers that not only enhance your website’s appeal but also captivate and engage your audience.
For developers this article is just an accelerator to start with your Three.js development, As you progress try out advanced features and different levels of complexity using additional geometries, materials, lighting, and textures. As an experienced 3D web development company, we build immersive and high-performance 3D web applications.
If you are looking for professional Three.js development services you can contact ColorWhistle by sending us a message or calling us at +1 (919) 234-5140, we’ll get back to you at the earliest. We provide services tailored to your requirements that suit your business. We are also experts at website development services, website designing, and digital marketing services. You can approach us for any of these services to make a robust online presence for your business.
What’s Next?
Now that you’ve had the chance to explore our blog, it’s time to take the next step and see what opportunities await!